


We have the wording Bubble Free* on our packaging because you can achieve bubble free epoxy resin projects using Craft Resin, but you will need to use some techniques in order to do this.
Bubbles can be very frustrating, especially if you are trying to achieve a crystal clear glass like finish to your projects, but don’t give up on your epoxy resin dreams just yet if you do experience bubbles, simply follow the guidance below to stop them forming in the first place or to get rid of them if they do appear.

First of all understanding what causes them can be really helpful, once you know why they are appearing you can work towards stopping it happening.
The 4 main causes of bubbles in epoxy resin projects:
1 - Cold resin mix temperatures.
2 - Pouring too much resin mix at once.
3 - Mixing your resin and hardener too fast.
4 - Your project is releasing trapped air.
Let's dive into these and see how we can get round them…

1 - Cold resin mix temperatures:
If your resin mix turns a misty/milky looking appearance to it then it means that you are having temperature issues and it is too cold. Resin loves warm temperatures and you need your work area and resin/hardener to be warm for your project to work really well.
The misty/milky look is due to lots of tiny micro-bubbles that form in cold resin. These cannot be removed once your work has cured, so you need to adjust the temperature before you begin.
It’s not just the room temperature that you should be keeping high, the ideal temperature to have your workspace and resin/hardener is between 21-24C or 70-75F. Between these temperatures your resin will be a joy to work with, it will flow really well and won’t have a misty look to it, it will be perfectly clear. The warmth will help bubbles to disperse before your eyes.
You can warm your resin/hardener bottles in a warm sink of water for about 10-15 minutes before you then measure them out. Make sure the lids are kept on the bottles fully secured, make sure the water doesn’t go above the Craft Resin label, and dry the bottles off before opening and measuring.
Any moisture that gets into your resin will affect your project in other ways. The last thing you want is to do something that alleviates one issue, but causes another so be careful at this step.

2 - Pouring too much resin mix at once:
Craft Resin is a designed as a coating resin, one that you coat your artwork with, although it is great at other projects too, you need to create thicker projects in layers.
If you pour a thicker project then air can get trapped under your project, creating bubbles at the bottom of your mold that you cannot remove while your resin is curing.
If you pour in layers this air is less likely to get trapped at the bottom and will allow you to get rid of any surface bubbles that do appear after each layer.
To remove these simply use a heat torch. Gently use sweeping movements to hover over your work with the heat torch applying direct heat to pop the bubbles as you go.
Be careful not to get the heat torch too close to your project, and don’t hold it on one area too long, this can cause other issues like rippling.
You need to use a heat torch and not something like a hair dryer to do this, as the heat from a hair dryer isn’t direct enough and can cause your resin to move and also dirt to be blown into it.
Once you have poured a layer of no more than 1/4 inch, you can disperse the bubbles then wait 3-5 hours before pouring the next.
Be careful to extend your curing times if you are building a project up in layers as the cure time will increase in time.
Pouring large amounts of resin can be very tricky to do so in a controlled way, if you pour a large amount too fast, or from too much of a height, then bubbles will also appear, so pour closer to your mold/artwork, pour slowly and controlled.

3 - Mixing your resin and hardener too fast:
Just as pouring too fast and from height can create bubbles, so can mixing your resin and hardener too fast as well. Again the action of stirring too fast and erratic in the mixing container acts as a kind of whisk, whipping up bubbles.
Mix your resin and hardener in slow and controlled ways, take at least 5 minutes at this stage, and even push it longer if your mix needs it. Make sure you scrape the bottom and sides of the mixing jug as you go.
As you mix this is warming the resin and hardener up starting the exothermic reaction that eventually leads to your work curing, the warmer your resin mix, the more that will help disperse the bubbles. However be careful not to go over time by too much because you can cause the chemical reaction to go too quick which can cause a flash cure. Keep practicing and you’ll find the sweet spot for your projects.
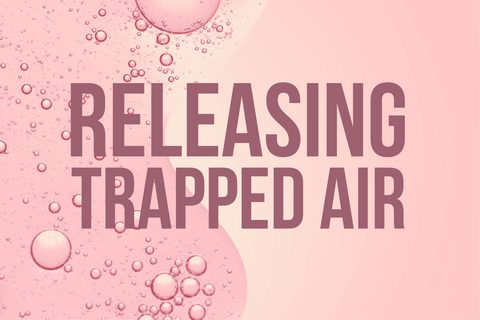
4 - Your project is releasing trapped air:
Projects that release trapped air are often projects with things in them, things like glitters, flowers, small trinkets etc. Air either gets trapped around these objects, or in the case of natural objects react with the resin giving off the gas that then traps bubbles in your work.
Layers are useful when your project has things in it. If you use the layering technique then you will be able to get rid of any bubbles that do appear as you build up the layers.
If you're working with flowers in your work please make sure they are completely dried out, and if you're worried about using a heat torch to remove the bubbles close to delicate flowers you can always prick the bubbles away with a cocktail stick as the work cures. We have a free course available which will teach you all you need to know about adding flowers to resin projects, click here to take a look.
You can also use a heat torch to get rid of surface bubbles that can appear in your projects. Read our blog on using a heat torch to find out more information about this.
You can also use a spritz of rubbing alcohol, isopropyl alcohol to remove the bubbles too. These last two won't create ripple effects like over torching can.
Our brilliant Facebook Community are always discussing ways in which they get rid of bubbles in their specific projects, join the group today and learn all the techniques like this you’ll need when working with our brands resin. If you can’t find the information to help in the group, why not ask the question yourself, our expert members will jump on to support you and talk you through everything you’ll need.
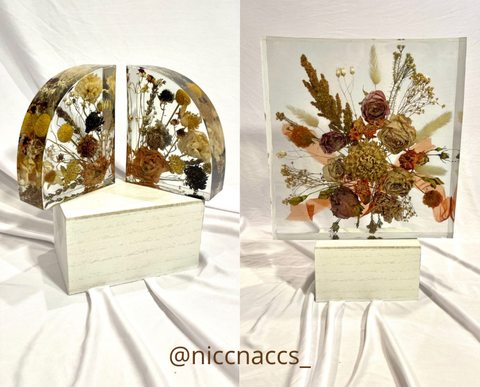
Check out these beautiful creations by Niccole from the brand @niccnaccs_ to see what can be achieved and how crystal clear your projects can be when you use the techniques in this blog:
We can't wait to see the projects like these that you also create, make sure you tag us on social media so that we can admire your work, but also you could win free resin too with our monthly Instagram giveaway!
Team Craft Resin

