


It’s nearing that time of year when Festive decorations start popping up in everyones homes and lights start to glisten as you’re walking through the streets - This year why not consider making your own Festive decorations to adorn your home.

Using a material like Epoxy Resin to create Festive decorations can be really easy to do, they are lightweight so great for hanging on your tree and you can create any colour/shaped items that you’d like to so you can match the exact colour themes and styles that you’d like to create in your home!
Festive decorations are also really great sellers at this time of year, if you have a resin business then you might want to consider creating Festive decorations to offer your customers. And again be very clear when marketing these creations to your audience that you can create bespoke decorations and colour themes to their needs as this is a great unique selling point compared to the bigger stores that can’t offer that bespoke touch.
For the purpose of this blog we’ll be sharing how to create simple tree decorations, however you could make any variation of decoration using these techniques.

So lets dive in, how to make your own Festive decorations in 10 easy to follow steps…
1 - Purchase your supplies:
In order to create with epoxy resin you will need to purchase a few basic supplies to create your projects:
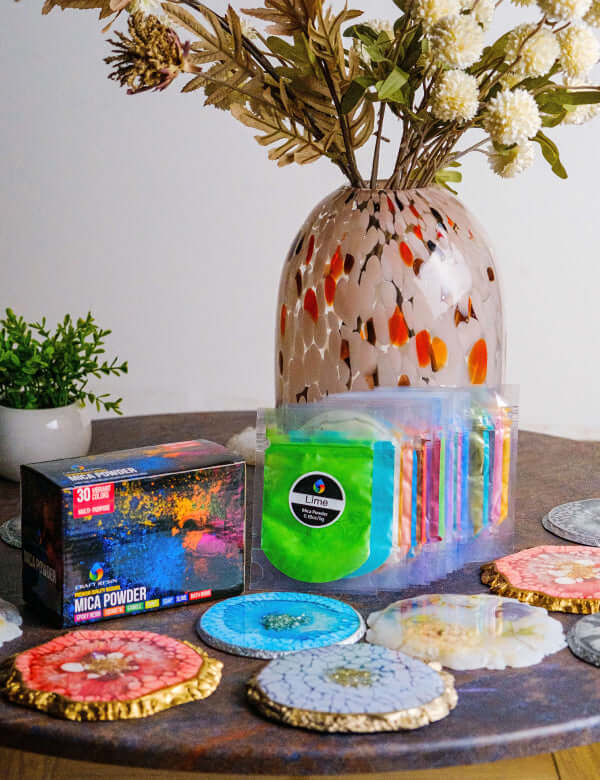
Craft Resin (Epoxy Resin)
Colorant (Craft Resin Mica Powders)
Safety Kit
Gloves
Apron
Plastic cover
Measuring jugs
Mixing jug
Mold/s
Cleaning supplies
Most of these supplies are easy to find around your home already, and others can easily be purchased online from our store or from somewhere like Amazon and delivered straight to your door. Once you have the kit many items can also be reused for lots fo different resin projects.
To read more about these items and why you will need them visit our blog all about the basic equipment you need to work with Craft Resin.

2 - Prepare your workspace and resin:
Craft Resin has a pot life (working time) of between 45-50 minutes. Because you don't have all the time in the world, you need to ensure you set up your workspace in advance of starting your project. Check you have the items you need as stated in the first step, and place them in easy reach of your workspace.
You'll also need to consider having worktops/flooring covered with plastic sheeting, and cleaning accessories to hand. Craft Resin is a low viscosity resin, which basically means it's quite runny, it can get everywhere and can be difficult to clean out of things like carpets and other fabrics if it is spilled or runs off the edge of your work.
At this stage please also set your workspace temperature to between 21-24C 70-75F. Temperature plays a huge role in your work going right and no issues occurring during the curing phase. Please ensure this temperature is kept consistent throughout the entire curing process of at least 24 hours. Resin loves warmth!
You might also need to warm your resin and hardener bottles before use in the winter months, read more about temperatures and how to warm your bottles up in our Cold Weather blog.

3 - Working your resin mix:
Once you have everything set up and you are ready to go you can follow the steps below to measure, mix and pour your resin into your mold/s.
If your resin and hardener has been left for a long period of time in a room that is between the temperatures above, it may be warm enough to work with already, but as an extra step just to make sure, you can always leave the bottles to warm for 10-15 minutes in a sink full of warm water.
Make sure the bottles are kept done up and that the water doesn’t go past the level of the Craft Resin label. If you get water in your resin then this will cause issues.
Measure your warm resin and hardener by a 1:1 volume, not by weight, weighing will throw the delicate balance needed of resin and hardener, and it won’t cure properly.
To measure by volume simply get two measuring jugs of the same brand and size, pour the resin and hardener into separate jugs up to the same levels, then place the jugs next to each other and check with eyesight to make sure they are both level. You can then pour one into the other if there is enough room to mix the resin and hardener together in the jug.
Silicone is a great material for the measuring and mixing jugs to be made out of as resin doesn’t stick to silicone, so they can easily be cleaned and refused to reduce waste.

4 - Mixing your resin and hardener:
Once the resin and hardener are in the same mixing container then you can follow this guidance to ensure your mixture is mixed enough to start the chemical reaction that will ensure your resin mixture cures (hardens).
If you don’t mix the resin and hardener enough, it can leave sticky uncured areas in your decorations, so following this step is very important.
You need to mix your resin and hardener slowly, in a controlled manner for a minimum of 5 minutes. Make sure you set a timer for this so you don’t mix below 5 minutes. Over time you will find the sweet spot for the amount of time that’s perfect for you to mix your resin for between these timings (The mixing time on our packaging may vary, we have recently changed the guidance from 3 minutes to 5, this will take a short while to be updated on the newer packaging).
If you mix your resin fast and uncontrolled, you can create lots of trapped air in the resin and bubbles will form.
Make sure when you are mixing that you scrape the sides and bottom of the mixing jug so that all of the resin and hardener is mixed together as much as it can be.

5 - Pouring your resin into your mold/s:
Once your timer goes off and your resin and hardener is mixed together, you can then pour the resin mix into your mold/s.
Pour slowly to avoid bubbles in the poured mix. Leave this to spread out once you have poured it into your mold. Craft Resin self levels so will spread out and fill your mold up to the edges.
Once it has rested and spread out over your project leave it a short while and then check for any surface bubbles that may appear. If they do start to show, then simply use a heat torch in sweeping movements over your work to disperse them and watch them pop before your eyes.

6 - Curing (hardening) your project:
Once you have poured your resin mix into your mold and removed any surface bubbles, it's time to step away and leave your work alone. You can cover your work if you would like to ensure it is kept clean and dust free. But leave it to sit in the room with the temperature between 21-24C or 70-75F for the next 24 hours.
Please do not move your work during the first 12 hours at least. Moving your work could also cause an uneven and rippled surface to your work.
Some projects can take longer to cure than 24 hours, but if you’re work hasn’t started curing within the first 72 hours then you may have got one of the techniques above slightly wrong.
Your temperature may have been too low, not measuring the correct volume of resin/hardener, or your project being thicker than 1/4". Thicker projects will need more time to cure. Read our blog on thicker projects to find out about these.

7 - De-molding your decorations:
Once your work has been curing for at least 24 hours you can check that it is hard to the touch, it still might be slightly flexible, however this will continue to harden over the next 72 hours. You can still de-mold during this flexible time, however make sure its placed back onto a flat surface afterwards to ensure it hardens straight.
Some molds can be harder to remove the resin than others, it can take a bit of force to get your project out of some molds. Try to remove gently at first, but then increase the strength if gently doesn’t work. You can purchase a mold release spray that can help, but it’s not essential.
8 - Perfecting your decorations:
Once your decoration has been removed from its mold you may notice little imperfections like drips that have formed on the edges or a pet hair attached to the top of the project. Don’t worry if you do notice imperfections, many of these can be sorted out after your project has cured.
To neaten the edges you might want to gently sand these down, and use scissors then sand paper to gently remove drips and smooth the edges. If this leaves the edges looking scratched thats ok, you can either coat them with a layer of gold permanent marker to hide these and create a great effect, or paint a layer of epoxy resin over the sanded edges to make clear and glossy again. If you do paint the edges you can rest the project on an upside down cup so that the edges don’t cure and attach to the plastic sheeting below the project.
If you notice a pet hair in your project, or a bubble gap where a bubble has burst, you can simple sand the top layer of your project, wipe clean with a dry cloth, then add another layer of resin to the top to fix the issue.
9 - Displaying your decorations:
As we said before, epoxy resin creations can be extremely lightweight so can make perfect tree decorations. But to hang your decorations on a tree you may need to drill a small hole in them so that you can then attach some beautiful string or ribbon to them to create the hanging element.
Of course you can also display your resin decorations in other locations other than your tree, they can adorn your whole home. The only thing to try to avoid is displaying your festive creations on a windowsill in direct sunlight, in the winter you might get away with this, but it could alter the colouring of your creations over time. So to help preserve them for the long term avoid direct sunlight.

10 - Packaging/Gifting/Selling your decorations:
Of course you can also sell your creations as part of your resin business, these are hugely popular this time of year and can offer your audience great bespoke decorations or gifts. If you are going to be selling your decorations then consider getting special packaging at this time of year that has an extra Festive touch to it, maybe offer a gift wrapping service for an extra charge so people don’t have to wrap their own presents.
If you are shipping your creations please ensure you allow lots of time for your decorations to cure, and protect them by placing them in the packaging with tissue paper between them so the resin decorations don’t stick together.
We have a couple of blogs available that might be beneficial to you if you are going to be packaging and selling your Festive decorations:
Pricing your epoxy resin creations
How to package your resin creations

The joy of handmade:
You might have read the above and thought you like the idea of making your own Festive decorations, but thats a lot of effort to go to! And you would be absolutely right. For simplicity you could go to a shop and buy your Festive decorations all ready made, however then you’re missing out on the pure joy that comes from making something that you then proudly display.
Not only is creating with epoxy resin a great mindful pursuit, and lets face it some mindfulness during the busy festive season would be wonderful. But also the pride you gain when someone comes round your house and comments on how much they love your Festive decorations and they ask where you got them from, and you comment back I made them! That feeling is absolutely priceless.
We also have a YouTube channel available and a Course platform where you can learn lots of FREE resin techniques like Christmas decoration making. Have a browse at the videos to learn more:
So what are you waiting for, create your own Christmas decorations today, and if you do please tag us in your stories/posts on Instagram sharing your decorations, we’d love to see what you make! @craft.resin
Topic Of The Week Giveaway:
We have attached a giveaway to these Topic Of The Week announcements on our Instagram platform, this is helping us to spread the knowledge of how to use epoxy resin further, but also enabling anyone who helps us share this information to win free resin and mica powders.

To enter the weekly giveaway please see the latest post #CRWEEK48 on our Instagram feed/highlights and follow the instructions to enter:
We hope you enjoy creating your own Festive decorations - We can't wait to see what you all create over the next month and beyond!
Team Craft Resin

