


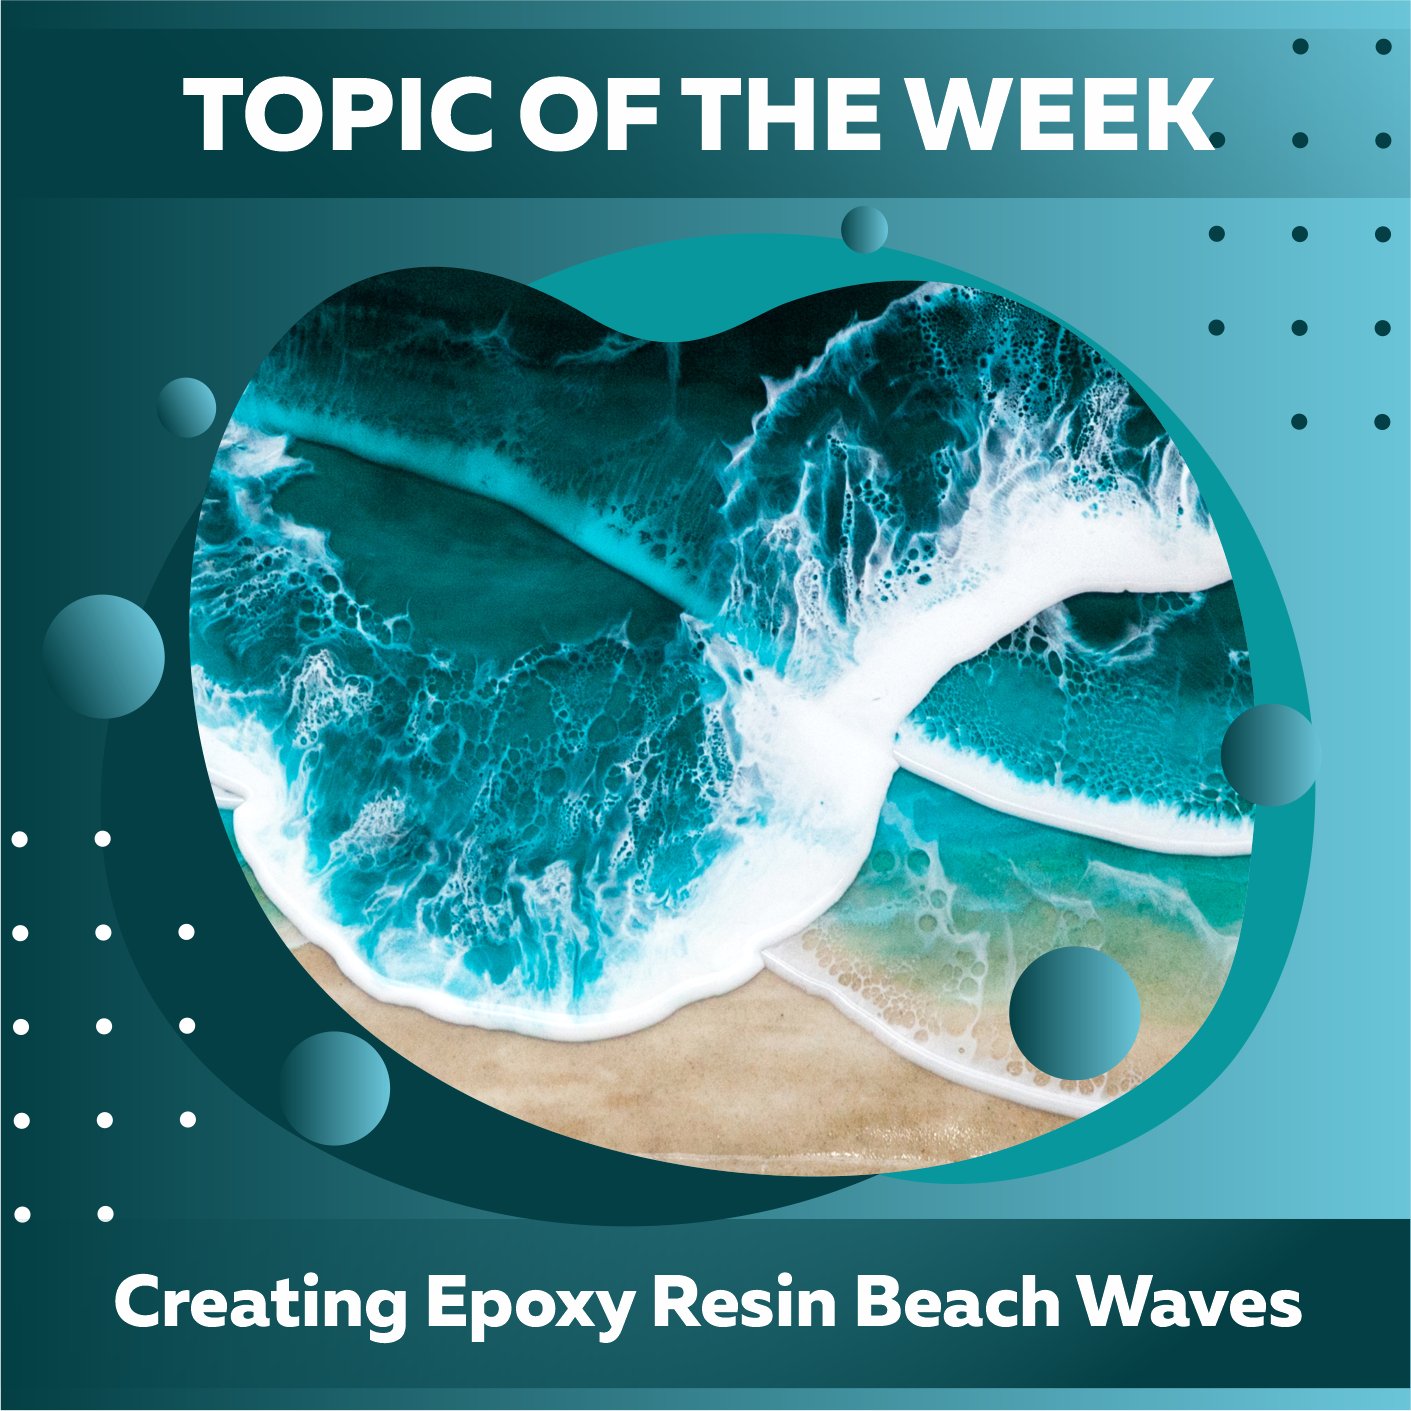
Have you ever admired the stunning resin waves made by other artists and wondered whether you could do something similar? Absolutely, and in just a moment, we'll show you how. If you follow the methods below, creating your resin ocean art will be a fun and easy experience.

The first step in making anything is deciding what kind of project you want. Will you be making a unique beach coaster or a collection of coasters? What about a piece of beach art? In contrast, a beach table top.
The final product's intended use determines the foundation material and preparation steps for adding the beach scene and epoxy resin. Please do your study on the exact project you choose to construct before we begin. However, today, we will discuss a generic beach project we would create using a mold.

The second thing you need to consider is what kinds of beach materials you have access to and what kinds of beach items you might need to produce out of diy resin starter kit ahead of time. For instance, you can gather shells when you're at the beach, or you might make your resin shells to add to your project. Do you have the option of gathering sand on your next trip to the beach, or do you have to purchase it from the hardware shop in your area? Collect stuff suitable for the beach as the year progresses, and when you go on vacation, look for things you can take with you and use at the beach.
After gathering these supplies, you may start visualizing your beach art. Remember that you'll create them in stages, first with the region closest to your mold or foundation, where you could wish to insert sand, then add shells, and finally, create the ocean section by pouring epoxy resin. You may plan your beach scene by drawing it out first, or you can start putting things down and see what happens. Epoxy resin is fluid. Thus, objects can move inside it, so even with careful planning, the final product may look differently than you imagined.
Then, after measuring and mixing your Craft Resin epoxy resin for around 5 minutes, you may add your sand and begin making your masterpiece. To learn about the correct proportions for the resin and how to pour it, visit our channel on YouTube.

Try different amounts of sand to see what works best; the exact amount you should add will vary. Then, after waiting a few minutes, pour this into your mold/onto your foundation. To get the desired sand layer in place, you have around 40 minutes before the Craft Resin becomes too hard to pour or be moved with the measuring stick.
After pouring this, you can use a heat torch to eliminate surface bubbles by gently sweeping it over the project. You can also use a cocktail stick to remove any imperfections of dirt or dust that you can see in the sand, if there are any. As the sand begins to harden, you can include any shells or other components of your project that you would like into your creation. They can sink to the bottom if they are added too near to the beginning of pouring the sand into the container; thus, it is important to add them when you need to for them to stand out and sit in the way you want them to.
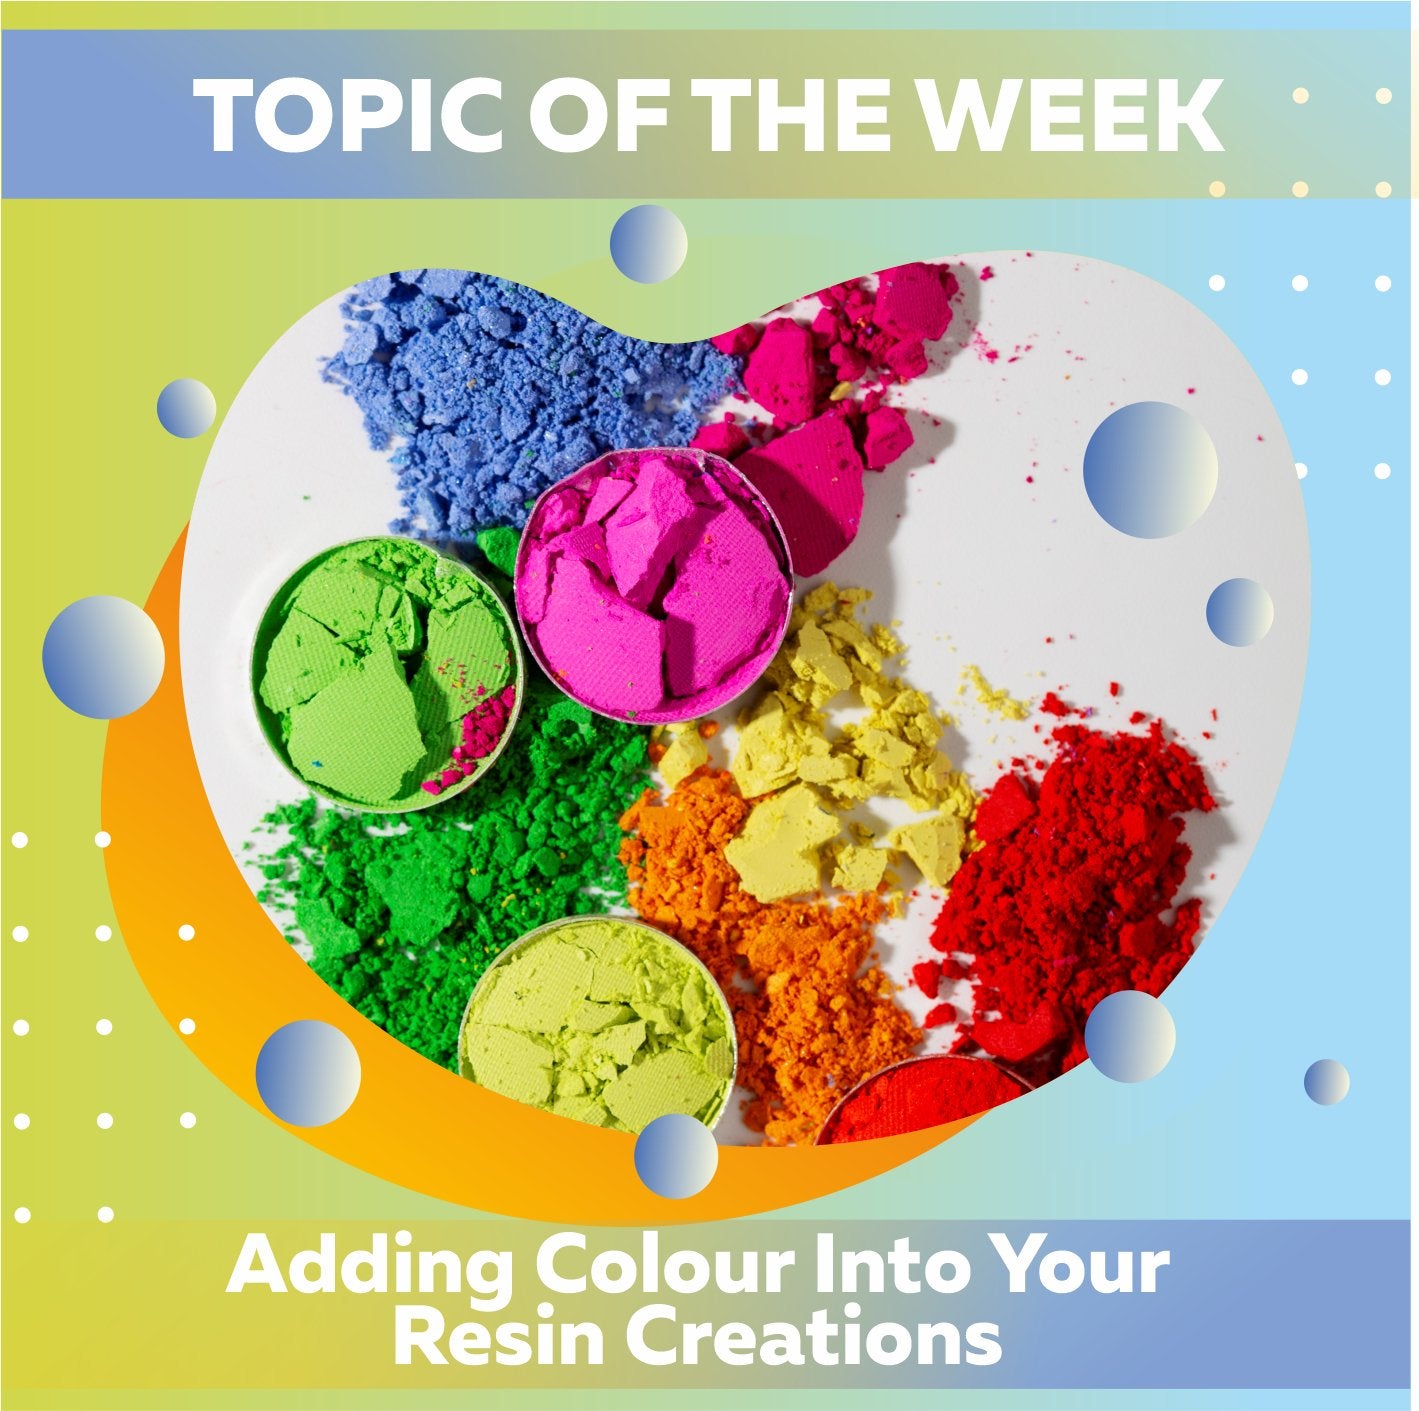
After you have placed the sand and any other things that belong on the beach, you may next begin combining a few shades of blue into two additional cups of resin mix, along with a white color. If you wish to make these colors, Mica Powders are an option for you to consider.

After thoroughly combining these components, you can put them into your masterpiece. It is ideal to begin by pouring the darker shade of blue towards the rear of your artwork. After that, pour on a lighter shade from this. The darker shade will represent the deeper ocean, and the lighter shade will represent being closer to the coastline. Finally, white will be utilized for the waves and the breaks.
Remember that a little epoxy glue goes a long way and that you are not attempting to cover the entire sandy region with the blue resin. You only need a small amount of blue resin to give the project an oceanic feel.
While wearing gloves, you may combine these to some extent. The next step is to gently press the brighter blue into the deeper blue using a heat torch held at an angle to produce wave effects. You may need to experiment with different motions until you find one that works.
After that, you may use a heat torch to carefully push back lines of the white resin mixture you added to the beginning border of the lighter blue. Because of this, your ocean will have realistic wave breaks. Again, start with a smaller amount and gradually increase it. If you put in too much at first, you won't be able to pull it out afterward.
If you want the top level to be perfectly flat or somewhat dome-shaped, adding a clear topcoat of epoxy resin products after the waves have been sculpted is the best way to achieve this effect, which is very useful for making beach coasters.
You will need to let them cure for at least twenty-four hours, and maybe even longer, depending on the thickness and the temperature of the location where they are being cured. Before pulling them out of the molds or transferring your artwork, you should always wait for longer if you are still determining whether or not they are ready.
You can sand down and shape the edges of your products if you have produced beach art in molds. If you want to, you may even use a colored pen to add to the edges, but you can also leave them as they are for the beach layers to display through at the edges. If you have created beach art in molds, this step is optional.

You now have personalized souvenirs of your vacation or beach stay. Or, think of all the vacation memories you might save for your customers if you added this service to your resin business.
Before stealing other people's treasured beach/holiday discoveries to make something to sell, try your hand at these types of crafts with your own. It takes practice to master the procedures required for a successful epoxy resin job.
We'd love to see your creative spin on beach-themed crafts you produce using the information in this blog, so be sure to tag us @craft.resin in any photos you share.
Topic Of The Week Giveaway:
We have attached a giveaway to this Topic Of The Week announcement on our Instagram platform; this is helping us to spread the knowledge of how to use epoxy resin further, but also enabling anyone who helps us to share this information to win free resin and mica powders.

To enter the weekly giveaway, please see the latest post pinned to the top of our Instagram feed and follow the instructions to enter:
Team Craft Resin
