

Drying flowers properly is one of the most important steps in preserving them in epoxy resin. If moisture remains trapped inside the petals or flower center, it can affect the appearance of your finished piece, contributing to cloudiness, bubbles or discoloration over time.
What is the best way to dry flowers for resin? Silica gel is one of the most reliable options, typically drying flowers in 2–7 days while helping them retain their natural shape and color. Air drying is a simple, inexpensive alternative, while microwave drying with silica gel can produce results much faster. Other options include suitable cat litter and sand-based drying methods.

In this guide, we'll compare five flower-drying methods, explain how to use each one, and show you how to check whether your flowers are ready for resin.
Table of Contents
- Why Flowers Must Be 100% Dry Before Resin Pouring
- Method 1: Air Drying - No Equipment, Maximum Patience
- Method 2: Silica Gel - How to Dry Flowers for Resin Quickly
- Method 3: Cat Litter Drying - The Budget Alternative
- Method 4: Sand Drying - The DIY Method That Requires Prep
- Method 5: Microwave Drying with Silica Gel - The Fastest Method
- How to Know When Your Flowers Are Completely Dry
- Which Resin to Use for Flower Preservation
- Method Comparison: Which Is Right for You?
- FAQ
Why Flowers Must Be 100% Dry Before Resin Pouring
When epoxy resin and hardener are combined, they undergo an exothermic chemical reaction - heat is generated as the two components bond at a molecular level. Water is not a neutral bystander in this reaction. It reacts with the hardener independently, consuming part of the hardener before it can fully bond with the resin component. This means that wherever moisture is present, the chemistry is incomplete.
What happens if you put flowers in resin before they are fully dried?
Cloudiness and white patches. Moisture that reacts at the boundary between the petal and the resin creates a foggy, milky appearance. This is not a surface issue - it goes all the way through the resin in that zone.
Bubbles. Water trapped inside petals turns to vapor slowly as the surrounding resin generates heat during curing. Those vapor pockets become permanently locked bubbles once the resin sets.
Browning and decomposition. Organic material that still contains moisture at the time of encapsulation continues to decompose inside the cured piece. The browning may not appear immediately - it can develop weeks or months after pouring.
Incomplete cure near moisture. In severe cases, where a thick or very fresh flower was embedded without proper drying, the resin surrounding the petal may remain soft or tacky even after the full recommended cure time.
None of these can be fixed. There is no way to extract the flower, reverse the cloudiness, or correct incomplete curing in an already-set piece. Which is why every hour you invest in proper drying is worth it.
Key fact: Flowers with petals that feel dry on the surface can still retain significant moisture inside the stem and at the base of petals. Surface touch alone is not a reliable test. Always check the thickest parts before pouring resin.
If you're wondering whether fresh flowers can go straight into epoxy, read our guide on using fresh vs dried flowers in resin to understand the risks before starting your project.

Method 1: Air Drying - No Equipment, Maximum Patience
Air drying is the oldest method and still the most widely used by beginners, because it requires nothing you do not already have. The tradeoff is time: a proper air dry takes 2 to 4 weeks minimum, and cutting that short is one of the most common reasons resin projects fail.
How it works
Moving air carries moisture away from the flower's surface. As the flower dries from the outside in, moisture from the interior migrates outward and evaporates. This is a slow process because there is nothing actively pulling moisture out - the flower releases it at its own pace.
Flat flowers versus volumetric flowers - two different approaches
This distinction matters more than most guides acknowledge, and getting it wrong leads to either crushed petals or flowers that rot in the center before they finish drying.
Flat and thin flowers - pansies, small daisies, individual petals, violas, forget-me-nots are best pressed flat between layers of dry kitchen paper or parchment, weighted under a heavy book or a dedicated flower press. The paper absorbs moisture as it transfers out of the petals. Replace the paper every 2 to 3 days during the first week, when moisture release is heaviest. Leave flat-pressed flowers for 3 to 4 weeks total. These dry flowers work directly as flat inclusions in shallow resin pours.
Volumetric and layered flowers - roses, carnations, ranunculus, peonies, small sunflowers - must be dried upside down. Hanging inverted keeps the petals from drooping as they lose moisture and structural rigidity. Tie stems in small, loose bunches of 3 to 5 stems - overcrowded bunches trap humidity between flowers and dramatically slow drying. Hang in a warm space with consistent airflow, away from direct sunlight.
Conditions that make or break air drying
Humidity. This is the single biggest variable. In a room with ambient humidity above 50%, flowers will not dry properly - they may mold or rot before the interior fully dries. If you live in a humid climate, air drying without a dehumidifier running nearby is unreliable. A warm, dry room - close to a radiator in winter, or a well-ventilated room in summer - is the right environment.
Sunlight. Warm air is helpful. Direct sunlight is not. UV exposure at this stage strips color aggressively. Roses bleach from deep red to dusty pink. Yellow flowers turn pale and washed out. Indirect light or a shaded location with airflow preserves color significantly better.
Airflow. Still, closed rooms with no air movement slow drying considerably. A gentle fan on a low setting, or a naturally ventilated space, keeps the air moving and reduces drying time.
Best flowers for air drying
Lavender, baby's breath, statice, small roses (the smaller the head, the better), carnations, strawflowers, amaranth, herbs (rosemary, chamomile, yarrow). These all have relatively lower moisture content and a structure that holds up to slow drying.
Flowers that do not air dry well
Large hydrangea heads, large peonies, sunflowers with thick disk centers, and any flower with dense, overlapping petals and high moisture content. These tend to rot in the center before the interior dries out, producing browned, damaged inclusions.
Common mistakes
Checking after one week and deciding it is ready - it is not. Air drying flowers for resin requires a minimum of 3 weeks, and 4 is safer for thicker varieties. Another common mistake is pressing volumetric flowers flat under a book - you lose the shape entirely. And storing drying flowers in a closed room or closet with no airflow: the humidity builds up from the flowers themselves and dramatically slows the process.
Method 2: Silica Gel - How to Dry Flowers for Resin Quickly
Silica gel is the method most experienced resin artists use as their default, and it is the answer when someone asks about the fastest way to dry flowers for resin. It dries flowers in 3 to 7 days - sometimes 24 to 48 hours for very thin blooms - while producing color retention that is noticeably better than air drying.

Why silica gel works so much faster
Silica gel is a desiccant - a porous material made from silicon dioxide that absorbs moisture into its structure. When flowers are buried in silica gel, the crystals draw moisture out of the petals from every surface simultaneously, instead of waiting for moisture to migrate to the surface and evaporate into the air. This is the difference between passive evaporation and active extraction.
What to buy
Use fine-grain silica gel crystals specifically sold for flower drying or craft use. The finer the grain, the better it can reach between petals and into dense flower heads without crushing them. Do not use silica sand - it is a different product and does not absorb moisture in the same way.
Look for a product with color indicator beads mixed in. These beads change color - typically blue to pink, or orange to green depending on the manufacturer - when the gel has absorbed its maximum moisture capacity. This gives you a visual signal that the desiccant needs to be reactivated before you can use it again.
Step-by-step
- Choose an airtight container - a plastic storage box with a snap lid works well. It must seal completely.
- Pour a 2 to 3 cm layer of silica gel crystals across the bottom.
- Place flowers face-up on the gel, or position them differently if their shape requires additional support. Petals should not touch each other or the container walls — leave space between each flower.
- For layered flowers like roses: using a small spoon or a squeeze bottle, gently fill silica gel between the outer petals, working from the outside toward the center. This step is what makes silica gel superior to other methods for preserving shape - every surface is in direct contact with desiccant.
- Slowly pour additional silica gel over and around the flowers until they are completely buried. Pour from the side, not directly from above, to avoid disturbing the petal arrangement.
- Seal the container and do not open it for 3 days.
- After 3 days, open the container carefully and check the flowers for dryness, paying particular attention to the thicker petals and the center. If any softness or moisture remains, reseal the container and leave for another 2 days before checking again.
Very thin flowers like pansies, violas, and individual petals often need only 24 to 48 hours. Dense flowers like large roses or dahlias need the full 5 to 7 days.
What to do when the color indicator changes
If your indicator beads have shifted color before your flowers are finished, your silica gel is saturated and has stopped working. You have two options: use fresh gel from a new container to finish the drying, or reactivate the saturated gel.
Reactivating silica gel for reuse
Spread saturated silica gel in a thin, even layer on a baking tray. Follow the manufacturer's instructions for oven temperature and drying time, as these can vary depending on the type of silica gel and moisture indicator. Allow the gel to cool completely before transferring it to an airtight container. Good-quality silica gel can be reactivated and reused many times.
Pro tip
After drying, remove flowers from the gel very carefully - they are fragile. Use a soft brush or a very gentle puff of air to remove any crystals clinging to petals. Work slowly. Dry flowers with thin petals can crack if handled roughly.
Method 3: Cat Litter Drying - The Budget Alternative Nobody Talks About
This method is genuinely underused in the resin community, and it works well. The right type of cat litter functions as a desiccant in essentially the same way silica gel does, at a fraction of the price.
Why it works
There are two types of cat litter that are effective for flower drying.
Silica crystal cat litter contains the same silicon dioxide as purpose-made floral silica gel. The crystals absorb moisture through the same mechanism. The main difference is granule size - cat litter crystals are typically larger, which means slightly less surface contact with petals. This is why the process takes longer than fine-grain silica gel.
Unscented clay-based cat litter contains bentonite clay, a naturally absorbent mineral that has been used as a desiccant in industrial applications for decades. It absorbs moisture effectively, though its capacity per gram is lower than silica gel.
Although both materials can absorb moisture, they do not perform identically. Silica crystal litter is generally the closer alternative to purpose-made flower-drying silica gel. Clay-based litter may also work, but drying results can be less predictable depending on the clay composition, granule size and flower type.
What to buy
The label matters. Buy unscented, non-clumping cat litter only. Check that the primary ingredient is silica, crystals, or clay.
Avoid:
- Clumping cat litter. The clumping agents react with moisture in a way that does not help flower drying and can leave residue on petals.
- Scented cat litter. The fragrance compounds are volatile and will transfer to your flowers, and can potentially interact with resin chemistry.
- Lightweight litters made from plant fibers, recycled paper, or wood pellets. These do not function as desiccants.
When in doubt, choose unused, unscented, non-clumping silica crystal litter with no added fragrances or deodorizing agents. If using clay-based litter, check the ingredients carefully and test it on a small batch of flowers first.

Process
The basic process is similar to drying flowers with silica gel.Layer cat litter in an airtight container, place flowers face-up without overlap, fill between petals of dense flowers, cover completely, seal. The only differences are timeline and the absence of a color indicator.
Timeline
2 to 3 weeks. Cat litter absorbs moisture more slowly than fine-grain silica gel, so the process takes longer. Do not rush it.
How to test for remaining moisture without a color indicator
Check the petals and the thicker parts of the flower carefully. Fully dried flowers usually feel light and papery, with no noticeably soft or damp areas. Pay particular attention to the base of the petals and the center, where moisture may remain after the outer petals have dried. Some dried petals retain a little flexibility. If you are unsure whether the flower is ready, leave it in the drying material for longer and check again before using it in resin.
Cost comparison
| Material | Relative cost | Main consideration |
|---|---|---|
| Purpose-made floral silica gel | Higher | Fine grains, reliable results, reusable |
| Silica crystal cat litter | Generally lower | Larger granules, results may vary |
| Unscented clay litter | Generally low | Composition and drying performance vary |
For anyone drying flowers regularly - for weddings, memorial pieces, or ongoing craft production - cat litter can be a more affordable alternative to purpose-made silica gel. The trade-off is less predictable drying performance, particularly with clay-based products. If preserving delicate petals, bright colors, and the original flower shape is your priority, fine-grain floral silica gel remains the more reliable choice.
Method 4: Sand Drying - The DIY Method That Requires Prep
Sand is one of the oldest materials used for flower drying, but it only works when properly prepared. The preparation step is where most people go wrong, and skipping it makes the method actively harmful to your flowers.
Why regular sand fails
Garden sand, builder's sand, and beach sand may contain residual moisture, dust, salts, or other impurities, depending on where they come from and how they have been stored. Using damp or contaminated sand can slow drying, stain delicate petals, and increase the risk of deterioration.
Unlike silica gel, ordinary sand is not a highly effective moisture-absorbing desiccant. Its main advantage is that it supports the flower's shape while moisture gradually evaporates. This is why clean, fine, completely dry sand and suitable drying conditions are essential.

How to prepare sand correctly
Step 1 - Wash. Rinse the sand thoroughly with clean tap water. Stir it while rinsing to suspend fine dust and organic particles, then let the sand settle and drain the cloudy water. Repeat until the rinse water runs clear. This removes impurities that can stain or contaminate your flowers.
Step 2 - Bake. Spread the washed sand in a thin, even layer on a baking tray. Place in an oven at 200°C (390°F) and bake for 30 minutes. The heat drives out all moisture from the sand particles. Do not assume that a fixed drying time guarantees completely dry sand. The time required depends on the amount of sand, the thickness of the layer, and the oven.
Step 3 - Cool. Allow the sand to cool completely before use. Hot sand will damage petals on contact.
Step 4 - The paper test. Before you place any flowers, verify the sand is genuinely bone dry. Place a small handful of prepared sand on a sheet of dry white kitchen paper. Fold the paper over the sand and press lightly. Wait 10 minutes. Open the paper and check: dry sand leaves no mark whatsoever. Any damp patch or shadow means the sand still contains moisture and needs more time in the oven.
The paper test can help reveal obvious residual moisture, but it cannot guarantee that every grain of sand is completely dry. If the paper shows a damp mark, continue drying the sand. If no mark appears, check that the entire batch has been dried evenly and cooled completely before use.
Process
Layer prepared, cooled, confirmed-dry sand in a container with a lid or cover. Place flowers carefully face-up. Sand is heavier than silica gel or cat litter - pour slowly from the side rather than dropping it directly onto petals, as the weight can crush or distort delicate structures.Cover the flowers completely with sand, taking care not to crush or bend the petals. Leave the container uncovered in a warm, dry, well-ventilated location, protected from accidental disturbance. Avoid humid rooms, as moisture needs to escape gradually during drying.
Timeline
3 to 4 weeks. Sand is the slowest method in this guide because it does not have the active absorption capacity of silica or bentonite. Unlike silica gel, sand mainly supports the petals while moisture gradually escapes; it does not absorb moisture as efficiently as silica gel.
Best flowers for sand drying
Sturdy flowers with lower moisture content hold up best under sand: roses, carnations, zinnias, marigolds. Flat flowers fare better than large volumetric ones - the weight of sand distributes more gently over flat petals than over layered, dome-shaped heads. Delicate flowers like sweet peas or very large peonies are poor candidates.
Why bother with sand at all?
It is free if you have access to a source, and once prepared correctly it can be reused many times. For crafters in areas where silica gel is not readily available, or for those drying large volumes of flowers without a budget for specialist materials, prepared sand is a legitimate option.
Method 5: Microwave Drying with Silica Gel - The Fastest Method
If you need to dry flowers for resin quickly, microwave drying with silica gel is the fastest method in this guide. Instead of waiting several days for the silica gel to absorb moisture naturally, microwave energy heats the moisture inside the flowers and speeds up the drying process.
The heating stage usually takes just a few minutes. However, the flowers must remain in the silica gel afterwards to cool and finish drying. Depending on the flower type, this can take another 10 to 36 hours.
This method can preserve flower color and shape remarkably well, but it requires more attention than conventional silica gel drying. Too much heat can scorch delicate petals, cause discoloration or make the flowers excessively brittle.
Why Microwave Drying Works
A microwave heats moisture within the flower, encouraging it to evaporate more quickly. The surrounding silica gel supports the petals, helps maintain the flower's shape and absorbs moisture during the drying process.
This combination makes microwave drying considerably faster than air drying or leaving flowers in silica gel at room temperature.
There is one important difference: you cannot simply microwave flowers for a few minutes and immediately embed them in resin. They still need time to cool and release remaining moisture before pouring.
What You Need
- Fine-grain silica gel specifically suitable for microwave flower drying.
- A microwave-safe glass or other heat-resistant container.
- Fresh flowers in good condition.
- A small microwave-safe cup of water.
- A spoon for positioning the silica gel between petals.
- A soft brush for removing crystals after drying.
Important: Not all silica gel products are suitable for microwave use. Check the manufacturer's instructions, particularly if the crystals contain color-changing indicators or additives. Never use metal containers, wire stems or materials that are not microwave-safe.
Step-by-Step: How to Dry Flowers in the Microwave
Step 1 - Prepare the flowers.
Choose fresh flowers before they begin to wilt. Remove unnecessary leaves and trim the stems if you do not need them for your resin project.
Flowers with moderately thin petals generally respond better to microwave drying than those with very thick, fleshy petals.
Step 2 - Prepare the container.
Pour a layer of microwave-compatible silica gel into the bottom of a microwave-safe container. Position the flowers carefully, leaving space between them. Most layered flowers can be placed face-up. Gently spoon the silica gel between the petals, working slowly to support their natural arrangement. Continue adding silica gel until the flowers are completely surrounded and covered.
Step 3 - Place the container in the microwave.
Leave the flower container uncovered during heating. Place a separate microwave-safe cup of water inside the microwave to help prevent excessive drying. Use a mediumpower setting where recommended by your equipment and silica gel manufacturer. Avoid assuming that a setting suitable for one microwave will produce the same result in another.
Step 4 - Heat carefully.
Microwave drying times depend on the flower type, size, moisture content, quantity of silica gel and microwave power. As a general reference, many flowers require approximately 1 to 3 minutes of heating, although some may need longer. Start with a short heating period and check the progress carefully, following the instructions for your materials. Do not continue heating if you notice scorching, smoke or an unusual smell.
Step 5 - Allow the flowers to cool and finish drying.
Once heating is complete, carefully remove the container using suitable heat protection. The container and silica gel may be very hot. Leave the flowers in the silica gel while they cool and complete the drying process. Depending on the type of flower, the standing period may range from approximately 10 to 36 hours. Large, densely layered flowers generally need more time than smaller, thinner blooms.
Do not rush this stage. Flowers intended for resin must be thoroughly dried, not simply warm and superficially dry.
Step 6 - Remove and inspect the flowers.
Once everything has cooled completely, gently pour away the silica gel and lift out the flowers. Use a soft brush to remove any crystals trapped between the petals. Check the thicker parts of the flower, especially the center and petal bases. If any areas still feel soft or damp, allow additional drying time before using the flowers in resin.
Which Flowers Work Best for Microwave Drying?
Microwave drying can work particularly well for:
- Daisies
- Zinnias
- Marigolds
- Carnations
- Small roses
- Pansies
Large dahlias and peonies can also be dried using this method, but their dense structure requires greater care and a longer standing period.
Flowers with particularly thick or fleshy petals are more difficult to dry evenly and may be damaged by overheating. For valuable flowers, such as those from a wedding bouquet, conventional silica gel drying is usually the more cautious choice.
Common Mistakes
Using the wrong silica gel. Some silica gel products and indicator crystals are not designed for microwave heating. Always check the product instructions before use.
Heating at full power without testing. Microwave ovens vary significantly. Excessive heat can damage petals before the flower has dried evenly.
Covering the container during heating. The flower container should remain uncovered so moisture and heat can escape.
Removing flowers immediately after microwaving. The standing period is part of the drying process. Skipping it can leave moisture in the center of the flower.
Working with irreplaceable flowers on the first attempt. Test the method on spare flowers of the same type before drying an entire wedding bouquet or other sentimental arrangement.
Pro Tip
If you're experimenting with microwave drying for the first time, start with one or two inexpensive flowers rather than a full batch. Record the flower type, microwave setting, heating time and standing period.
Once you find a combination that preserves the color and shape without overheating, you'll have a useful reference for future resin projects.
Microwave drying can save considerable time, but for most beginners, conventional silica gel drying remains the more forgiving option. The goal is not simply to dry flowers as quickly as possible — it is to prepare flowers that will look beautiful once preserved in clear epoxy resin.
How to Know When Your Flowers Are Completely Dry
Regardless of which method you used, run all three of these tests before the flower contacts resin. Skipping this step is the single most expensive mistake in flower resin work - expensive in time, materials, and finished pieces.

The Feel Test
Pick up the flower carefully and gently check the petals. Fully dried petals should feel light, dry, and papery rather than soft or damp. They may retain some flexibility depending on the flower type, so brittleness is not a requirement.
Work from the outer petals toward the center, paying close attention to:
- The base of the petals — where each petal meets the center. This is one of the last areas to dry, especially in dense flowers.
- The flower center — thick or tightly layered centers may retain moisture even when the outer petals feel completely dry.
- The remaining stem — if any stem is still attached, check the cut end and thicker areas carefully.
If you notice soft or damp areas, the flower needs more drying time.
The Weight Test
Flowers lose a significant amount of weight as they dry. A fully dried flower should feel noticeably lighter than a fresh one of the same type and size.
For a more reliable check, use a digital kitchen scale. Weigh the flower near the end of the expected drying period, then weigh it again after additional drying time. If the weight continues to decrease, moisture may still be escaping.
When the weight remains stable between checks, it suggests that drying is approaching completion. However, stable weight alone does not guarantee that every part of a thick flower is completely dry, so combine this method with a careful inspection of the petals and center.
The paper test
Place the flower flat on a piece of dry kitchen paper. Leave for 1 to 2 hours without moving it. Come back and check the paper directly under where the flower was resting. If the paper shows any damp patch, ring, or discoloration - more time in the drying medium. If the paper is completely unchanged - your flower is ready.
What properly dried flowers look like
Properly dried flowers often have a lighter, papery texture and a more delicate structure than fresh blooms. Their colors may appear softer, darker, or more muted, depending on the flower and drying method.
Petals should feel dry throughout, while thicker centers and remaining stems require extra attention. Some dried flowers remain slightly flexible, while others become more fragile.
Once embedded in clear resin, dried flowers may appear more vibrant as the resin enhances their color and contrast. However, resin cannot reverse browning or damage caused by improper drying.
Pro tip
If you're working with valuable or irreplaceable flowers, dry an extra bloom from the same batch and use it to check the thicker petals and center more thoroughly. This allows you to assess the drying progress without risking damage to the flowers intended for your final resin piece.
Which Resin to Use for Flower Preservation

Drying your flowers properly is only half the preparation. The resin you choose matters just as much, especially when working with delicate petals or preserving whole flowers in three-dimensional pieces.
The most important factor is pour depth. A thin pendant with pressed flowers needs a different resin from a deep casting containing an entire rose or wedding bouquet.
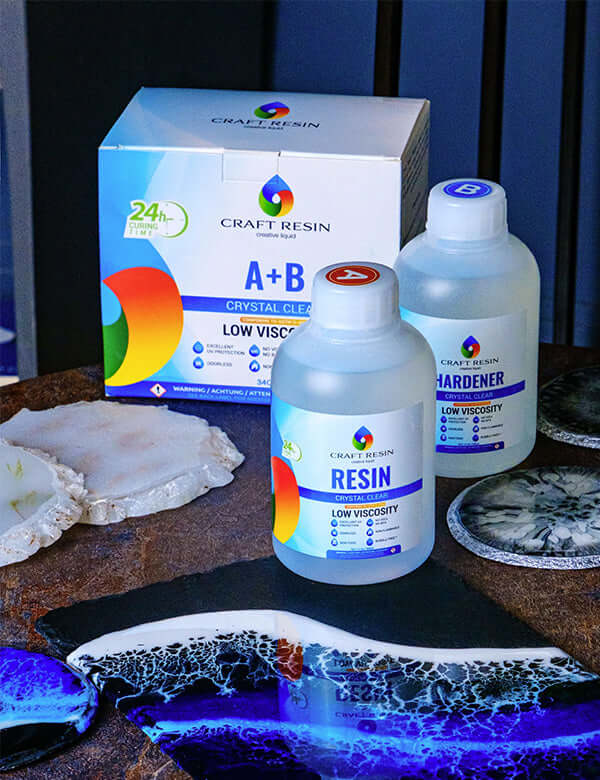
Craft Resin Arts and Crafts - for Jewelry, Coasters and Shallow Molds
For smaller projects such as pendants, earrings, coasters and decorative pieces, Craft Resin Arts and Crafts Epoxy Resin is a practical choice.
Its low-viscosity formula flows around fine petals and into small mold details, helping trapped air escape during pouring. It is designed for shallow pours up to 1/4 inch (6 mm) per layer.
Arts and Crafts resin can also be used to apply a thin sealing coat to dried flowers before embedding them in a deeper casting, helping reduce air pockets around delicate petals.
If you're planning to use your dried flowers in silicone molds, see our guide on how to cast flowers in epoxy resin molds for tips on positioning flowers and pouring resin in layers.
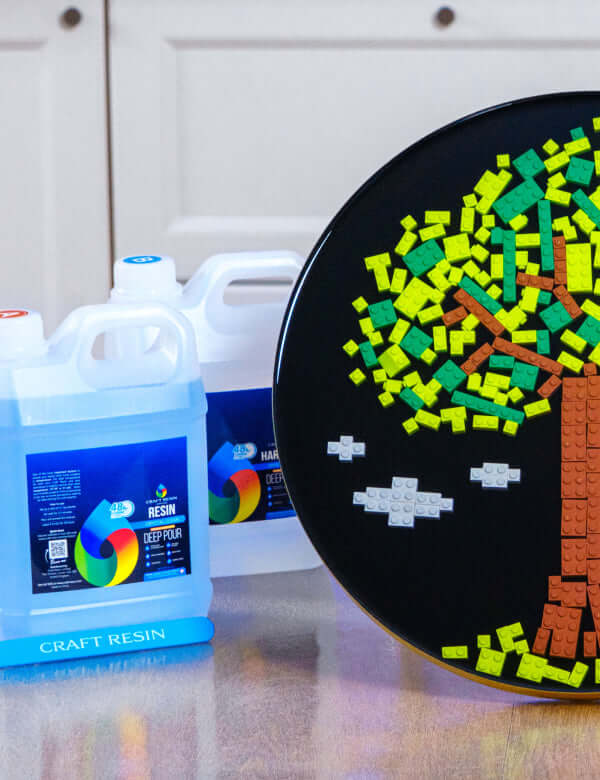
Craft Resin Deep Pour - for Whole Flowers and Deep Castings
If you want to preserve three-dimensional flowers, thick roses, wedding bouquets or decorative floral blocks, Craft Resin Deep Pour Epoxy Resin is the better option.

Its slower-curing, low-viscosity formula is designed for thicker pours and helps manage heat buildup while allowing resin to flow around complex flower shapes.
Deep Pour can be used for layers up to 2 inches (5 cm), depending on the mold dimensions and working conditions. Larger or more complex pieces may require several carefully planned layers.
For whole bouquets and sentimental flower arrangements, see our guide on how to preserve a wedding bouquet in resin, including planning the arrangement and working with Deep Pour.
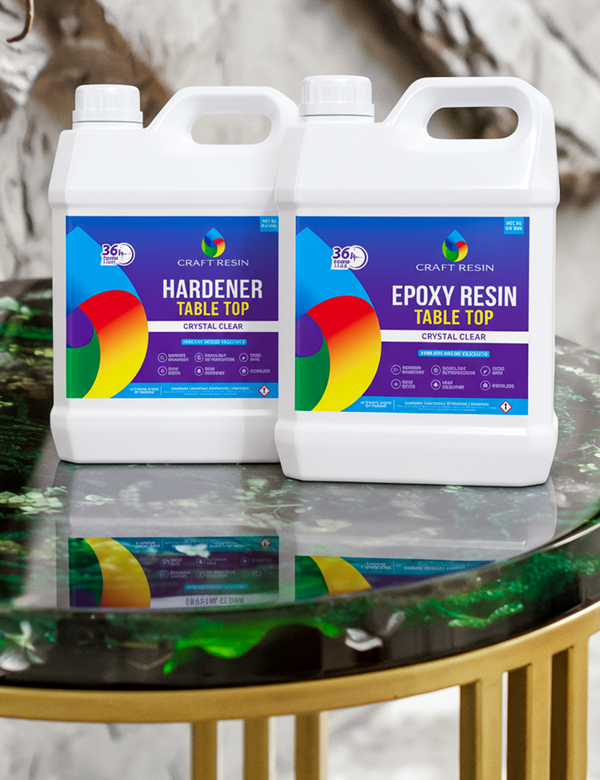
Craft Resin Table Top - for a Protective Glossy Finish
For flat floral artwork, decorative trays and panels that need a final glossy coating, Craft Resin Table Top Epoxy Resin provides a clear, self-leveling protective finish.
Table Top is designed for surface coatings rather than deep flower encapsulation. Apply it in thin layers according to the product instructions.

Once your flowers are fully dried and you have chosen the right resin, follow our step-by-step guide to preserving flowers in epoxy resin to learn how to arrange, seal and embed them successfully.
Method Comparison: Which Is Right for You?
Full method comparison table
| Method / Feature | Air Drying | Silica Gel | Cat Litter | Sand Drying | Microwave + Silica Gel |
|---|---|---|---|---|---|
| Timeline | 2–4 weeks | 3–7 days | 2–3 weeks | 3–4 weeks | Minutes (heating) + 10–36 hours (resting) |
| Cost | Free | Higher | Generally low | Free (with prep) | Higher |
| Equipment needed | None | Airtight container | Airtight container | Container + oven | Microwave, microwave-safe container, microwave-compatible silica gel, cup of water |
| Color retention | Moderate (fading risk) | Excellent | Good | Moderate | Excellent (when technique is correct) |
| 3D shape preservation | Good (hanging) / Poor (pressing) | Excellent | Good | Moderate | Excellent |
| Reusable | N/A | Yes (reactivate in oven) | Yes | Yes (rebake) | Yes (reactivate in oven) |
| Moisture indicator | None | Color-change beads | None | Paper test | Color-change beads (check microwave compatibility) |
| Best for | Lavender, baby's breath, small flat flowers | All flower types, especially dense blooms | All flower types | Sturdy flowers, flat blooms | Daisies, zinnias, carnations, small roses, pansies |
| Difficulty | Easy | Easy–Moderate | Easy | Moderate (requires prep) | Moderate–High |
| Risk of error | Humidity, timing | Saturated gel | Timing, wrong litter type | Inadequate sand prep | Overheating, wrong silica gel type, skipping resting period |

Choose by priority
Fastest method: Microwave drying with silica gel. The heating stage takes only minutes, although flowers need additional cooling and drying time before they are ready for resin. It requires careful temperature control to avoid damaging delicate petals.
Best balance of speed and results: Silica gel. For most resin artists, this is the most practical choice. It typically dries flowers in 3 to 7 days while helping preserve their natural color and three-dimensional shape.
Lowest cost: Air drying or prepared sand. Both cost nothing beyond what you likely already have.
Best for beginners: Air drying for flat flowers, or silica gel if you want reliable results without much guesswork.
Best color preservation: Silica gel, by a meaningful margin over all other methods.
Best for volumetric roses and dense blooms: Silica gel or cat litter - both allow you to fill between petals, preserving shape from every direction.
Best for high-volume production (preserving wedding flowers, large batches): Suitable cat litter can be a lower-cost alternative for large quantities of flowers, but results are less predictable than with purpose-made floral silica gel. Test it on spare flowers before using it for valuable blooms.
Frequently Asked Questions
Can you put fresh flowers directly into resin?
Fresh flowers contain substantial moisture and should be thoroughly dried before being embedded in resin. Otherwise, trapped moisture can contribute to cloudiness, bubbles, browning, or curing problems, depending on the flower and resin formulation.
How long do flowers need to dry before going in resin?
It depends on the method. Air drying takes approximately 2 to 4 weeks, silica gel 3 to 7 days, cat litter 2 to 3 weeks, and sand drying 3 to 4 weeks. Microwave drying with silica gel takes minutes to heat, followed by approximately 10 to 36 hours of resting time in the gel. These are estimates, not guarantees: always check the flowers before embedding them in resin.
What happens if you put underdried flowers in resin?
Residual moisture in flowers can contribute to cloudiness, bubbles, discoloration, and, in some cases, curing problems. Flowers that retain moisture may also deteriorate over time. The exact effects depend on the flower, the amount of moisture, and the resin and curing conditions. Defects trapped inside a cured piece can be difficult or impossible to repair.
Can you use cat litter instead of silica gel for drying flowers?
Suitable unused, unscented, non-clumping silica crystal cat litter can be a budget alternative to floral silica gel. Some clay-based litters may also work, but their performance is less predictable. The basic process is similar, not identical; drying may take approximately 2 to 3 weeks. Check the ingredients and test the material on spare flowers first.
Why does the sand need to be baked before use?
Naturally sourced sand can contain moisture and impurities that interfere with flower drying. Wash suitable fine sand and dry it thoroughly before use; the drying time depends on the amount of sand, layer thickness, and oven. A paper test may reveal obvious dampness but cannot guarantee that the entire batch is completely dry.
How do I know if my flowers are completely dry?
Combine several practical checks: the petals and thicker parts should feel dry rather than damp or soft; the flower should be noticeably lighter, and repeated weighing can show whether it is still losing moisture; and a paper test may reveal obvious dampness. None of these checks alone guarantees that every part of the flower is moisture-free.
Can I dry flowers in the microwave?
Microwave drying with silica gel can reduce drying time to minutes, but the risk of overheating and damaging both the flowers and the silica gel is higher. The heat cycles require careful attention and results vary more than the slower methods.
Do I need to seal flowers before putting them in resin?
Many resin artists seal dried flowers with a thin coat of resin, Mod Podge, or a clear sealant before the main pour. This is particularly recommended for flowers with many fine petals or anything fragile, as it prevents air pockets from forming between the petals and the poured resin. It is not required for all flowers but improves results on dense, layered blooms.
Which Craft Resin product should I use for preserving flowers?
For jewelry, coasters, and other small shallow molds, choose Craft Resin Arts and Crafts Epoxy Resin. For whole flowers or deep decorative castings, choose Craft Resin Deep Pour Epoxy Resin and follow the recommended layer-depth limits. Craft Resin Table Top Epoxy Resin is intended for glossy surface coatings on flat pieces rather than deep flower encapsulation.