


- When UV resin can be used as glue for glass, acrylic, jewelry, and craft repairs
- Why super glue and epoxy fail on glass and acrylic and what UV adhesive does differently
- How a 5–10 second cure changes the way you work on small, detailed repairs
- What Shore 85D hardness and optical-grade clarity mean for visible repairs
- Why the 395nm wavelength matters for consistent, reliable curing
- How to use Craft Resin Bonding UV step by step for jewelry, glass, and craft repairs
Can UV resin be used as glue?
UV resin can be used as glue for small, non-porous surfaces such as glass, acrylic, metal, ceramic and jewelry components, as long as UV light can reach the adhesive layer. It works best as a thin, clear bond line rather than a thick gap filler. For opaque materials, deep repairs or structural load-bearing joins, a different adhesive may be more suitable.

UV adhesive cures optically clear in 5–10 seconds and gives you full control over when it sets, making it one of the best options for nearly invisible repairs on glass and acrylic. Standard super glues can leave a frosted bloom, while some epoxies may yellow over time. UV adhesive is designed to avoid those issues when used correctly.
UV Resin vs Super Glue and Epoxy: Why Clear Repairs Need More Control
You notice it straight away. A broken glass ornament, a loose stone in a ring, a cracked acrylic charm. You reach for the super glue, press the pieces together - and the repair is more visible than the break. A white halo around the joint. A cloudy film across the surface. The piece is fixed, but it looks fixed.
This is the core problem with standard adhesives on transparent materials. The challenge is not strength. It is visibility. Most adhesives were not designed to disappear on glass and acrylic, so they do not.
Standard super glues are a common first choice. They are fast and widely available, but cyanoacrylate tends to leave a frosted bloom on smooth transparent surfaces, and the bond can be brittle under flex or impact. For anything that needs to stay invisible, the result falls short.
Epoxy systems are stronger and more gap-filling, but they require mixing, take hours to cure, and often introduce a yellow tint over time. For small repairs on clear surfaces, that tradeoff rarely works in your favour.
UV adhesive solves both problems at once. It cures clear, bonds hard, and does it in seconds, but only when you are ready. You control the moment it sets. That on-demand curing makes precise placement possible on tiny parts and fragile surfaces where there is no margin for repositioning.

Craft Resin Bonding UV is designed specifically for this kind of work. It is a clear, low-odour formula that cures under 395nm UV light and holds with a plastic-like bond on glass, acrylic, metal, ceramic, and most hard surfaces used in jewelry and craft projects.
UV Resin Glue Adhesive vs Super Glue vs Epoxy: Full Comparison
Choosing the right adhesive for a glass or acrylic repair is mostly about understanding where each material fails.
| Feature | Super Glue | Two-Part Epoxy | Craft Resin Bonding UV |
|---|---|---|---|
| Cure time | 30–60 seconds | 5 minutes to several hours | 5–10 seconds under UV light |
| Cure control | Starts immediately on contact | Starts as soon as parts are mixed | You choose when it cures |
| Clarity on glass | Often leaves a frosted bloom | May yellow over time | Cures optically clear |
| Bond type | Brittle | Strong, gap-filling | Hard, plastic-like |
| Repositioning | Very limited | Limited window | Full control until light is applied |
| Best use | Quick, low-visibility fixes | Structural gaps and larger surfaces | Precision repairs on clear surfaces |
| Odour | High | Moderate to high | Low odour |
In simple terms, UV resin vs CA glue comes down to clarity and timing. CA glue is fast, but it can bloom on clear surfaces. UV curing resin glue gives you more control because it only hardens when exposed to the correct UV light.
UV Glue vs UV Resin
The terms UV glue and UV resin are often used together, but they are not always exactly the same. UV resin is usually used for coating, doming, casting or decorative work. UV resin glue is formulated specifically for bonding two surfaces together. Craft Resin Bonding UV sits in this bonding category: it behaves like a clear UV epoxy resin glue, but cures on demand under a 395nm UV flashlight.
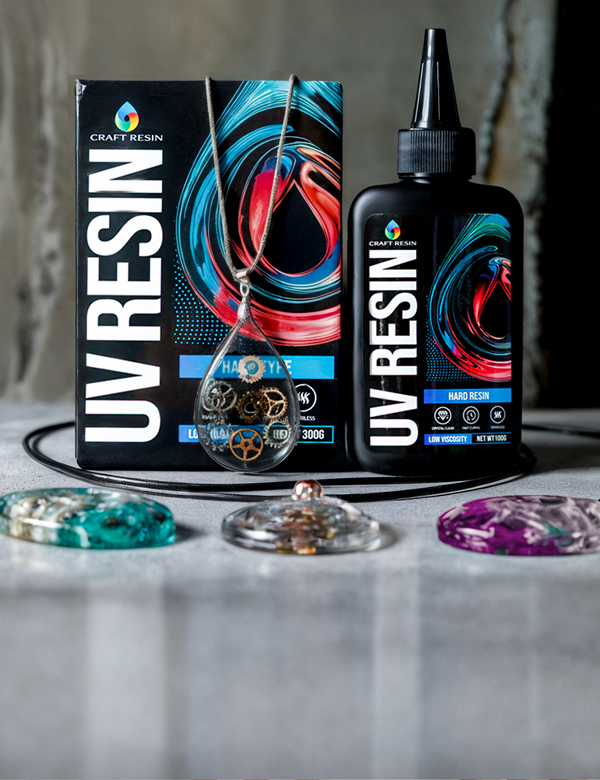
What Is in the Craft Resin Bonding UV Kit

The kit is built around a complete repair setup for small, precision work. Each item has a specific purpose in the workflow.
| Kit Component | Specification | Purpose |
|---|---|---|
| UV Bonding Glue | 30g clear formula | The main adhesive - ready to use straight from the tube |
| UV Flashlight | 5W rechargeable, 395nm | Triggers the cure on demand, portable and compact |
| Precision Tweezers | Included | Accurate placement of small parts before curing |
| Protective Gloves | Included | Clean handling of uncured adhesive |
The flashlight operates at 395nm, which is the wavelength range the formula is optimised for. Using a lamp at a different wavelength can result in incomplete or uneven curing - one of the most common causes of a soft or sticky bond. The rechargeable design keeps the setup portable and practical for a regular craft table.

The precision tweezers address a specific challenge in small-part repair: holding a 2mm glass bead or thin acrylic connector in place while applying adhesive cleanly. With uncured UV adhesive, you have all the time you need to position the piece correctly before turning on the light.
| Property | Craft Resin Specification | Why It Matters |
|---|---|---|
| Final Hardness | Shore 85D | Glass-like feel - scratch-resistant and stable under heat |
| Viscosity | Low | Flows into fine details, bubbles release naturally |
| Clarity | Optical Grade / Crystal Clear | Non-yellowing formula stays bright and clear over time |
| Shrinkage | Less than 2% | High surface fidelity - will not pull away from bezel edges |
Best Uses for UV Adhesive: Glass, Acrylic, Jewelry and More
The formula is optimised for small-scale, precision bonding on non-porous hard surfaces. It is not intended for large-area coverage or structural load-bearing repairs.

Jewelry repair and assembly. Bonding UV is a natural fit for jewelry work. It handles loose stones, broken clasps, split ring settings, detached charms, and small connectors. The clear finish keeps repairs invisible on transparent or semi-transparent pieces. For makers also working with molds, Craft Resin Silicone 15A is a practical companion for casting new jewelry components at home.
Glass accents and decorative elements. For attaching glass cabochons, flat-back crystals, and decorative glass pieces to frames, trays, and decorative objects, UV adhesive delivers a clean bond without visible residue. The optical-grade clarity is especially important when the adhesive layer sits between two reflective surfaces.
Acrylic and plastic craft components. Thin acrylic pieces, charm blanks, keyrings, and small plastic components respond well to UV adhesive. The plastic-like hardness of the cured bond is particularly useful on surfaces that have some flex, where a brittle cyanoacrylate bond might crack under normal use.
UV Resin Model Glue for Fine Detail Work. For miniature assembly, prototype work and model building, UV resin model glue is useful because parts can be aligned precisely before the bond is cured.
Surface coating and doming. UV adhesive can also be used to create a hard, glossy top coat on small craft pieces. For larger resin surface projects, Craft Resin UV Kit offers a no-mix UV resin with a dedicated 36W lamp, built for thin-layer casting and coating work.
Small household repairs. Ceramic figurines, broken glass ornaments, detached decorative hardware, and similar small objects are all good candidates for Bonding UV - especially when the repair needs to stay invisible.
What UV Adhesive Is Not Designed For
UV light only penetrates a few millimetres into the adhesive. Thick gap-fills, large surface bonds, and opaque materials that block light are not ideal applications. For porous surfaces like wood or uncoated stone, the adhesive may not achieve a reliable hold without surface preparation. For deep-pour or large-volume casting, Craft Resin Deep Pour is the right product instead.
How to Use UV Resin Glue on Glass and Acrylic: Step-by-Step
A clean repair depends on surface preparation, accurate placement, and proper curing. Each step matters.
- Prepare the surfaces. Both surfaces need to be clean, dry, and free from dust, oil, grease, and old adhesive residue. Any contamination will reduce hold strength and may cause the adhesive to cure with a hazy appearance. Use isopropyl alcohol on a cotton tip to clean the area and allow it to dry completely before applying adhesive.
- Prepare tools and workspace. Put on the gloves before handling uncured adhesive. Have the tweezers ready for small-part placement. Keep the UV flashlight within reach but pointed away from the adhesive until you are ready to cure. Uncured UV adhesive will not set until light hits it - you are in control of the timing.
- Apply a small, precise amount. Put on the gloves before handling uncured adhesive. Have the tweezers ready for small-part placement. Keep the UV flashlight within reach but pointed away from the adhesive until you are ready to cure. Uncured UV adhesive will not set until light hits it - you are in control of the timing.
- Position the pieces. Bring the two surfaces together carefully. Use the tweezers for very small or slippery parts. Press gently and hold. Because the adhesive does not cure until light is applied, you still have time to adjust the position. Once you are satisfied with the placement, maintain light pressure.
-
Cure under the UV flashlight. Hold the 5W flashlight 1–2 cm above the bonded area. Keep it steady and expose the adhesive for 5–10 seconds. For thicker applications or pieces with more pigment, extend the cure time slightly. If the joint is accessible from both sides, a brief cure from each side helps ensure the bond is fully set through.

- Check the cure and clean the edges. After curing, press the joint gently to confirm the hold. Any uncured adhesive that squeezed out around the edges can be removed carefully with a toothpick before it is cured, or trimmed cleanly once it is fully hard. The cured adhesive is transparent and hard, so small amounts on the surface can often be left if they are not visible.
Common Mistakes When Using UV Adhesive on Glass
Even with a fast-curing, easy-to-use formula, a few mistakes come up repeatedly - especially when working on transparent surfaces where errors are most visible.
Applying too much adhesive. Excess UV glue squeezes out from the joint during pressing and cures as a visible ridge around the repair. Apply the thinnest possible layer to one surface only. A barely visible film is enough.
Not cleaning the surface before bonding. Skin oils, dust, and old adhesive residue all prevent a full bond and can cause the cured adhesive to look hazy or cloudy. Always clean with isopropyl alcohol and let the surface dry before applying glue.
Curing only from one side. If the mold or piece blocks light from the bottom, the adhesive may stay soft underneath even if the top looks set. Whenever possible, cure from both sides for a complete bond.
Using the wrong wavelength lamp. Not all UV lamps cure all UV adhesives. Craft Resin Bonding UV is formulated for 395nm light. Using a lamp outside this range or a very low-power lamp - can leave the adhesive soft, sticky, or only partially cured.
Holding the lamp too far away. UV light intensity drops quickly with distance. Keep the flashlight 1–2 cm from the surface for reliable curing. The further away it is, the longer the cure time and the higher the risk of an incomplete bond.
Pouring too thick in one pass. UV light penetrates only a few millimetres. If you are using the adhesive to fill a gap or build up a surface, work in thin layers and cure each one before adding the next.
Pro Tips for Cleaner, More Reliable Results
- Work in indirect light. UV adhesive will not cure under normal room lighting, but working in direct sunlight or near a strong UV-emitting lamp can shorten your working time unexpectedly. A standard indoor setup away from direct sunlight gives you the most control.
- Use the minimum effective amount. Excess adhesive around a repair is one of the most common causes of a visible result. A thin, even film between two surfaces holds just as reliably as a thick application and leaves far less to clean up afterward.
- Test cure time on a scrap piece first. If you are working on a valuable piece or a difficult material, cure a small test amount on a spare surface first. This confirms lamp distance, cure time, and final clarity before committing to the repair.
- Keep the tip clean between uses. UV adhesive can begin to cure inside the nozzle if light reaches it during storage. After each use, wipe the nozzle clean with a dry cloth and cap the tube tightly. Store away from direct light and heat.
- Check compatibility on unusual materials. Some materials - particularly certain coated metals and specialty plastics - may not bond reliably without surface preparation. If you are unsure, apply a small amount to a hidden area and test the hold before working on the visible part of the repair.
Quick Recap
Before starting a repair with Craft Resin Bonding UV, keep these points in mind:
- Clean, dry, grease-free surfaces are essential for a strong, clear bond
- Apply a thin layer - excess adhesive is the main cause of visible repairs
- Position pieces fully before curing - the adhesive does not set until the light is applied
- Cure from both sides when possible for a more complete bond
- Use the included 5W 395nm flashlight for reliable, fast results
- 5–10 seconds under the lamp is enough for most small repairs
Standard adhesives leave traces on glass and acrylic. UV adhesive cures clear, bonds hard, and gives you full control over when it sets. For jewelry repair, acrylic assembly, glass accents, and detailed craft work, that combination is hard to replace with anything else.
FAQ
Can you use UV resin as glue on glass?
Yes, you can use UV resin as glue on glass if the adhesive layer is thin and exposed to UV light. It is not ideal for thick, hidden or opaque joints.
Is UV adhesive stronger than super glue?
For transparent surfaces like glass and acrylic, UV adhesive generally delivers a more reliable result. It cures into a hard, plastic-like bond and does not leave the frosted bloom that cyanoacrylate super glue typically causes on smooth clear surfaces. Super glue is faster to apply but more brittle and less suitable for visible repairs.
Does UV glue work on acrylic?
Yes. UV adhesive bonds well to acrylic and other hard plastics. It cures clear and hard, and the plastic-like finished bond is a good match for acrylic's own properties. Make sure the surface is clean and dry before applying, and keep the layer thin for the cleanest finish.
Why is my UV glue still sticky after curing?
The most common causes are curing only from one side, holding the lamp too far from the surface, using a lamp with the wrong wavelength, or applying the adhesive too thick. Cure from both sides for 5–10 seconds each, keep the flashlight 1–2 cm from the piece, and ensure you are using a 395nm lamp.
Can UV adhesive be used for jewelry repair?
Yes - UV adhesive is well-suited for jewelry repair. It handles loose stones, broken clasps, detached charms, and small connectors. The optically clear cure means repairs stay invisible on transparent and semi-transparent pieces. The 5–10 second set time also reduces the chance of components shifting before the bond holds.
How long does UV adhesive bond last?
When applied correctly to clean, non-porous surfaces, the cured bond is durable and stable over time. Craft Resin Bonding UV cures to Shore 85D hardness - similar to hard plastic and the low-shrinkage formula (under 2%) means the bond does not pull away from edges or surfaces as it ages.
Can I use any UV lamp to cure UV adhesive?
Not reliably. Craft Resin Bonding UV is formulated to cure in the 395nm wavelength range. The included 5W rechargeable flashlight is matched to this range. Lamps with different wavelengths or very low wattage may result in incomplete curing, leaving the adhesive soft or sticky.
How do I remove cured UV adhesive if I make a mistake?
Once fully cured, UV adhesive is hard and resistant to most household solvents. On glass surfaces, a sharp plastic scraper can lift a thin cured layer without scratching. Acetone or isopropyl alcohol can help soften partially cured adhesive. Prevention is easier than removal - work carefully and position pieces fully before applying light.
Ready to Make Your First Invisible Repair?

A broken piece of jewelry, a cracked glass accent, a loose stone - these are fixable without leaving any evidence they were ever broken. Craft Resin Bonding UV gives you a practical all-in-one kit to start with: clear formula, rechargeable 5W lamp, precision tweezers, and gloves. Everything you need for a clean, controlled repair on the surfaces that show every mistake.
Shop Craft Resin Bonding UV and repair it so well, no one will ever know.
