

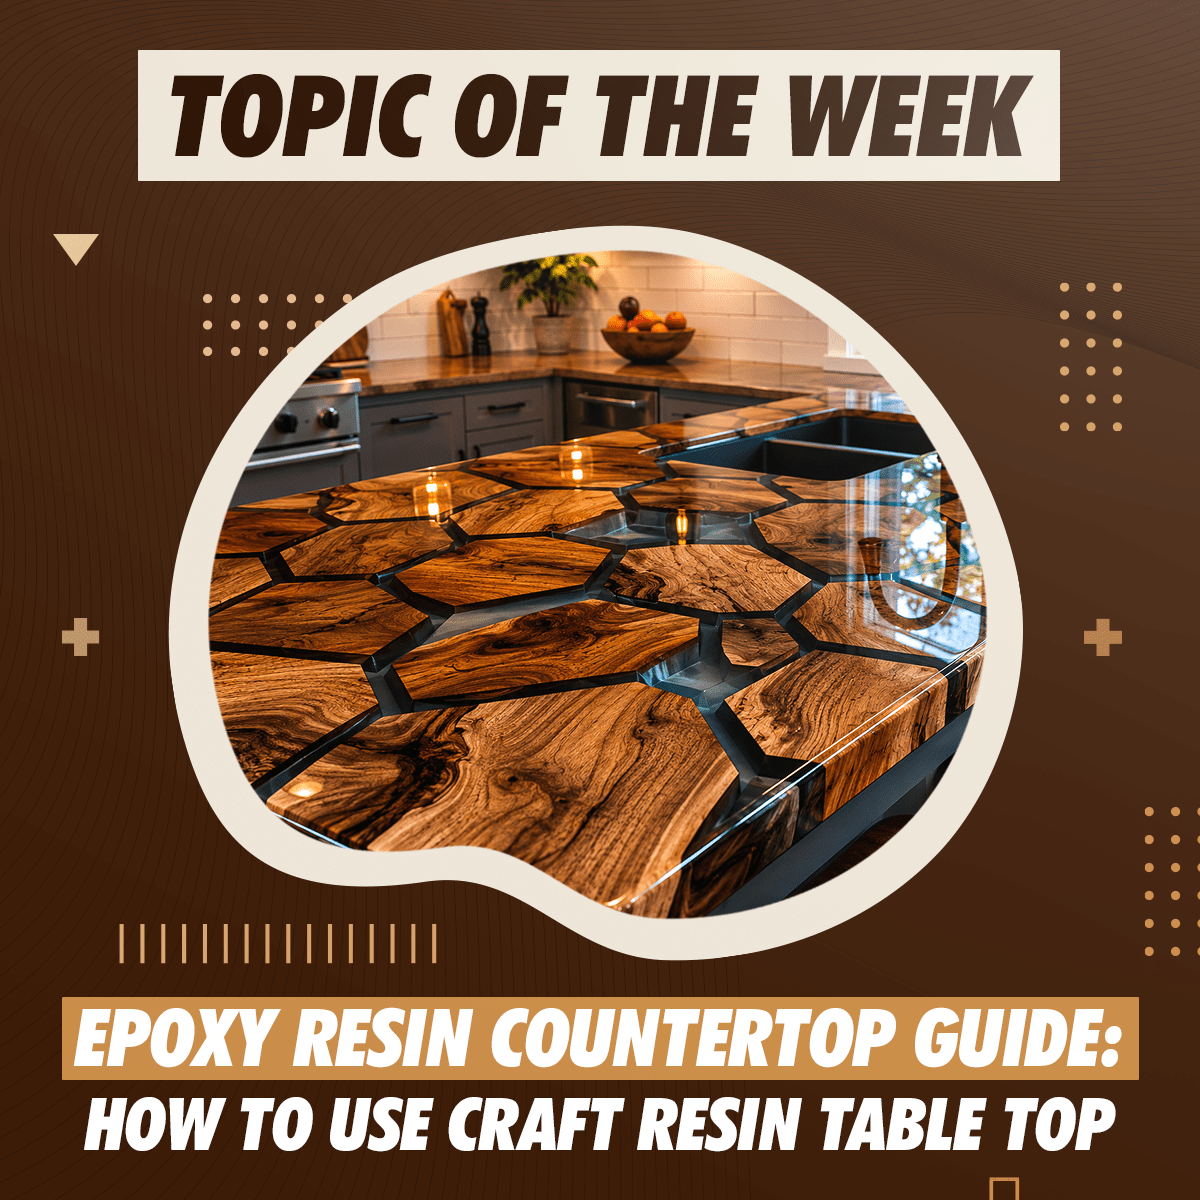
Epoxy resin countertops have become a popular DIY alternative to traditional granite, quartz, and laminate surfaces. This guide explains how to create a durable kitchen worktop using Craft Resin Table Top, including preparation, application, curing, costs, and common mistakes.

- Why Table Top works exceptionally well on kitchen countertops and worktops
- How epoxy resin compares to granite, marble, quartz, laminate, and wood
- How much an epoxy resin countertop actually costs
- Two ways to use it: coating an existing surface or finishing a custom build from scratch
- Step-by-step application guide, common mistakes to avoid, and long-term maintenance
Quick Answer: Craft Resin Table Top creates a crystal-clear, high-gloss, durable coating on kitchen countertops and worktops. Mix at 1:1 by volume, apply at 3mm per coat, and allow 72 hours before everyday use and 21 days for full heat resistance up to 80°C. Works on existing laminate, wood, concrete, and stone surfaces as well as custom-built countertop bases. Suitable for incidental food contact once fully cured.
Why epoxy resin works well for kitchen countertops
Walk into a kitchen supply showroom and the options look identical to every other showroom. Granite. Quartz. Laminate. The same finishes, the same color ranges, the same surfaces that every other kitchen already has. None of them let a homeowner choose the color, the effect, the depth, or the way the light moves across the surface.
Craft Resin Table Top changes that. The same formula that creates a glass-like coating on a bar top or a furniture piece produces a kitchen worktop that no showroom stocks at any price. A surface with metallic pigments running through it. A timber countertop where the grain is visible with depth that looks almost three-dimensional. A concrete base under a coat so clear it could pass for polished stone. These results come from one product and a process that a homeowner or maker can do themselves.

This guide covers whether the project is right for the situation, what the results actually look and feel like, and how to apply Craft Resin Table Top to a kitchen countertop correctly from start to finish.
Epoxy Resin vs Traditional Kitchen Worktop Materials
Before deciding on any countertop material, it is worth comparing the realistic options across the factors that matter in daily kitchen use.
| Material | Heat resistance | Scratch resistance | Customization | DIY-friendly | Maintenance | Average cost per m² (approx., USD) |
|---|---|---|---|---|---|---|
| Granite | Excellent | Very good | None | No, professional installation required | Requires periodic sealing | $400–$800 (material + fitting) |
| Marble | Moderate | Poor, etches with citrus and vinegar | None | No, professional installation required | High, stains and acids damage the surface | $500–$1,050 (material + fitting) |
| Quartz (engineered) | Good | Very good | Limited | No, professional installation required | Low | $400–$900 (material + fitting) |
| Laminate | Poor, scorches easily | Moderate | Limited | Possible | Low | $40–$130 |
| Solid wood | Poor, swells with moisture | Moderate, needs regular oiling | High with craftsmanship | Possible | High, regular oiling required | $130–$400 |
| Concrete | Good | Moderate, requires sealing | High | Possible | Moderate | $200–$500 |
| Epoxy Resin Table Top | Up to 80°C after 21 days | Very good after full cure | Unlimited | Yes | Low once cured | $40–$80 (materials only, DIY) |
The materials with the highest prestige, granite, marble, and quartz, cannot be installed by a homeowner, offer no customization at all, and require professional trade labor at significant cost. Laminate is accessible but delivers a fraction of the aesthetic quality and durability.
Craft Resin Table Top is the only option that is both high-performance and genuinely accessible to a maker or homeowner. The result looks like a premium material because it is one.
The one honest limitation: full heat resistance up to 80°C only arrives at 21 days post-cure. During those first 21 days, use trivets under hot pots and pans. After 21 days the surface handles normal kitchen heat without any concern.
How Much Does an Epoxy Resin Countertop Cost?
This is usually the question that clinches the decision.
A professionally installed granite or quartz countertop in the USA typically costs between $3,000 and $8,000 for a standard kitchen, including material, templating, and fitting, depending on the material grade and location.
Craft Resin Table Top for a standard kitchen countertop of 3 to 4 square meters requires approximately 3 to 4 liters of mixed resin for a single coat. The material cost is a small fraction of professional installation pricing. The tools required (mixing cups, torch, spreader, spirit level) add a modest amount to the total.
To calculate exactly how much Craft Resin Table Top is needed for a specific countertop size, use the coverage calculator on the Craft Resin website. Measure the length and width of the surface in meters, multiply to get the total area, and the calculator gives the volume of resin required including a recommended buffer for mixing losses.
The result, done correctly, is a surface that performs comparably to premium professionally installed materials. The cost difference is significant. The trade-off is doing the work personally and following the application process carefully.
Is an Epoxy Resin Countertop the Right Choice?
Yes, if: The goal is a custom finish that cannot be bought in a showroom. An existing countertop needs transforming without replacing the whole unit. A custom-built countertop needs a protective surface. The budget does not extend to professional stone installation.
Less ideal if: A standard neutral-color surface is the goal with no interest in being involved in the application process. In that case, a professionally fitted quartz worktop is a simpler route.

Why Craft Resin Table Top Is the Correct Formula for Countertops
Not all epoxy resin formulas work on countertops. The viscosity has to match the job.
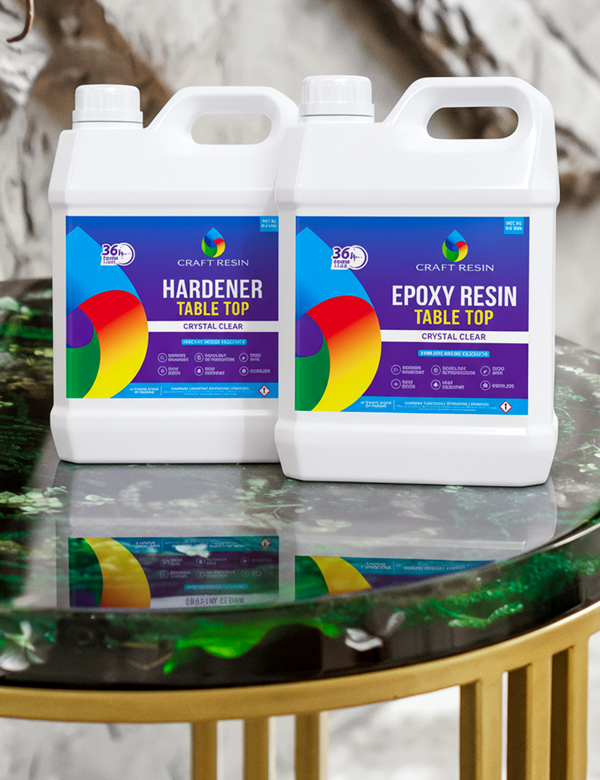
Craft Resin Table Top has a viscosity of 3800 CPS. Viscosity measures how thick or fluid a liquid is. At 3800 CPS, Craft Resin Table Top is thick enough to stay where it is applied on a flat horizontal surface, self-level slowly into an even coat, and not run off the edges before curing begins. That is exactly the behavior a countertop application requires.
Two other Craft Resin formulas will not produce the same result on a flat surface:
- Craft Resin Arts and Crafts at 1400 CPS is noticeably thinner. On a large flat surface it would run off the edges before leveling properly, wasting material and producing an uneven finish.
- Craft Resin Deep Pour at 600 CPS is far too thin for countertop use. Deep Pour is engineered for filling molds from depth, not for coating flat horizontal surfaces. On a worktop it would run immediately.

For countertop and worktop coating, Craft Resin Table Top is the correct product.
Key specifications
| Specification | Value |
|---|---|
| Mix ratio | 1:1 by volume, not by weight |
| Viscosity | 3800 CPS |
| Working time | 30 to 45 minutes |
| Maximum depth per coat | 3mm |
| Everyday kitchen use | 72 hours after application |
| Full mechanical strength | 21 days |
| Heat resistance | Up to 80°C after 21 days |
| Finish | Crystal clear, high gloss |
| Food safety | Suitable for incidental food contact once fully cured |
Two Ways to Use Craft Resin Table Top on a Kitchen Countertop
Option 1: Coat an Existing Countertop
The epoxy coat goes over the existing surface and creates a completely new finish on top of it. The countertop unit stays in place. Only the surface changes.
Suitable existing surfaces: laminate in good structural condition, wood or butcher block countertops, concrete worktops, tiled surfaces where grout lines have been filled level, and painted surfaces that are properly prepared.
The transformation is often dramatic. A laminate worktop that has looked dated for years comes out looking like a bespoke custom surface. A plain timber countertop gains a coat so clear that the grain appears to be sitting under glass. The before and after are not subtle.
Surface preparation is the single most critical step in the process. Any contamination including grease, wax, silicone residue from cleaning sprays, or fingerprints will prevent proper adhesion and leave visible defects in the cured coat. Degrease with acetone or isopropyl alcohol, allow to dry completely, and do not touch the prepared surface with bare hands again after that point.

Option 2: Finish a Custom-Built Countertop from Scratch
A custom-built countertop starts with a base material chosen for its structural or aesthetic character. Craft Resin Table Top provides the final surface.
Live edge wood slabs allow natural timber grain and character to show through a crystal-clear coat. For a kitchen with a colored river channel running through the wood, Craft Resin Deep Pour handles the river section while Craft Resin Table Top finishes the surface.
Concrete bases give an industrial aesthetic that works particularly well in modern kitchen designs. Concrete is highly porous and needs multiple thorough seal coats before the main Table Top application.
Colored artistic bases start with a Craft Resin Arts and Crafts pour using mica powders, alcohol inks, or pigment pastes, then receive a clear Craft Resin Table Top coat as the protective surface. The resulting countertops do not exist at any price in a showroom.
The DIY and maker communities at r/DIY, r/woodworking, and r/interiordesign document hundreds of custom epoxy countertop builds with full material lists, build logs, and honest accounts of what worked and what did not.
What Is Needed Before Starting
For the application:
- Craft Resin Table Top (1 liter covers approximately 1 square meter at standard coat depth)
- Graduated mixing cups with clear volume markings
- Mixing sticks
- Foam brush or plastic spreader
- Heat torch or heat gun
- Nitrile gloves and safety goggles
- Spirit level
- Clean lint-free cloths and an appropriate surface cleaner
For surface preparation:
- Acetone or isopropyl alcohol for degreasing
- 220-grit sandpaper to roughen smooth surfaces and help the resin grip (this is called creating a mechanical key - it means the surface has enough texture for the resin to bond to)
- Plastic sheeting or newspaper to protect surrounding areas
For porous surfaces (wood or concrete):
- Additional Craft Resin Table Top or Craft Resin Arts and Crafts for a seal coat

How to Apply Craft Resin Table Top: Step by Step
-
Level the workspace
Confirm the countertop is perfectly level with a spirit level before mixing anything. Epoxy resin follows gravity exactly. Even a 2mm tilt across a kitchen surface causes the coat to pool on one side and cure unevenly. Adjust with shims underneath the unit if needed. Keep the room between 21 and 27°C and humidity between 50 and 65% throughout the application and the full 72-hour cure. Humidity above 65% causes cloudiness in the finished surface. -
Prepare the surface
Clean and degrease the countertop thoroughly. For laminate or painted surfaces, lightly sand with 220-grit paper to improve adhesion. For wood and concrete, apply a seal coat before the main pour. -
Apply a seal coat on porous surfaces
For wood, concrete, and natural stone, mix a small batch of Craft Resin Table Top and work it into the surface with a foam brush. Allow to reach the tacky stage. The tacky stage is when the surface feels slightly sticky like the back of a self-adhesive label but leaves no fingerprint when pressed lightly with a gloved finger. This typically takes 4 to 6 hours. The seal coat closes all pores so no air bubbles travel up through the main coat from below. Skipping this step on porous surfaces almost always results in bubbles that a torch cannot fix. -
Mix the resin
Mix Craft Resin Table Top at exactly 1:1 by volume. Use graduated cups and read the measurement line at eye level. Reading from above causes small but real errors that affect the chemistry. Mix slowly and steadily for 3 to 5 minutes, scraping the sides and bottom of the cup on every pass. Transfer to a second clean cup and stir briefly again to eliminate unmixed material from the walls of the first cup. -
Pour and spread
Pour the mixed resin onto the center of the countertop. Use a foam brush or spreader to guide the resin toward all edges in one slow, even pass. Then stop. Every additional pass over resin that has already started to level introduces air and uneven texture. Craft Resin Table Top self-levels once guided.
For large or angular countertops, work in sections and plan the pour sequence in advance so resin reaches every area within the working time. -
Remove bubbles
Pass a heat torch or heat gun over the surface at 15 to 20cm distance in slow, continuous sweeping passes. Never hold the heat stationary because concentrated heat causes permanent yellowing at that point. Return for a second pass after 5 to 10 minutes as new bubbles may rise during early curing. -
Cover and cure
Cover the surface loosely with a clean board or cardboard. Do not use an airtight cover. Keep the room at temperature. Leave completely undisturbed for 72 hours before any kitchen use. Full hardness, scratch resistance, and heat resistance up to 80°C arrive after 21 days.
For edge finishing technique, how to apply a second coat, and how to repair surface issues after cure, read How to Work with Wood and Epoxy Resin on the Craft Resin blog.
Common Mistakes to Avoid
Even experienced resin makers can run into issues on a first countertop pour. These are the most common problems and how to avoid them.
| Problem | Cause | How to avoid it |
|---|---|---|
| Bubbles rising from below the surface | Porous wood or concrete not sealed before the main coat | Apply a seal coat first and wait for the tacky stage |
| Uneven surface after curing | Countertop was not level before the pour | Always confirm level with a spirit level before mixing |
| Cloudy or hazy finish | Humidity above 65% during the pour or cure | Check humidity before starting, work in a controlled environment |
| Resin running off the edges | Wrong formula used (too thin) or working time exceeded | Use only Craft Resin Table Top, work within the 30 to 45 minute window |
| Soft or sticky patches after 24 hours | Mix ratio was off, or room temperature dropped overnight | Measure at eye level, maintain 21 to 27°C throughout the full cure |
| Yellowing on one spot | Torch held stationary on that area | Keep the torch moving at all times, never pause over one spot |
| Visible line between two coats | Second coat applied after full cure without sanding | Apply the second coat during the tacky window (4 to 8 hours), or sand first |
What the Finished Surface Looks and Feels Like
This is the part that makes the project worth doing.
Run a hand across a fully cured Craft Resin Table Top surface and the texture is smooth and cool, like polished stone. The gloss reflects the kitchen light with the depth of glass, not the flatness of painted laminate. If the base is wood, the grain sits underneath the surface looking further away than it actually is. If the base was colored with pigments, the effect has a depth and movement that changes as the viewing angle changes.
The surface resists daily kitchen contact without flinching. Utensils, cleaning, general use - none of these mark a properly cured surface. Use a cutting board for chopping because the same rule that applies to granite applies here: concentrated sharp impact on any hard surface can chip it.
After 21 days, the surface takes everyday kitchen contact without trouble. Cookware straight from the oven or off the hob is a different question - use a trivet for that, as with any kitchen surface.
No pores means liquids, acids, and bacteria sit on top rather than penetrating. Wipe clean with a damp cloth and mild soap. Nothing more is needed.
For makers who want to go further: after full cure at 21 days, the surface can be wet-sanded through progressive grits (400, 800, 1500, 2000) and polished with a resin-compatible polish to achieve an even deeper gloss than the poured finish provides.
Can You Put Hot Pans on Epoxy Resin Countertops?
This is one of the most common questions about epoxy resin kitchen surfaces, and the honest answer depends on one thing: how long ago the countertop was coated.
Craft Resin Table Top reaches full heat resistance of up to 80°C only after 21 days of complete curing. In the first 21 days, the surface is still developing its mechanical and thermal properties. During this period, placing a hot pan, a casserole dish straight from the oven, or a kettle that has just boiled directly onto the surface can cause white marks, soft spots, or surface distortion. This is not a defect in the product. It is simply the chemistry completing its process.
After the 21-day mark, the surface handles everyday kitchen heat without any problem. Hot mugs, warm plates, food preparation with steam or heat - none of these are a concern on a fully cured Craft Resin Table Top surface. What the 80°C figure does not cover is direct contact with cookware straight off the hob or out of the oven: a pot of boiling water sits at 100°C and a casserole dish is hotter still, both above the threshold. Those always need a trivet, on this surface and on most others.
That said, using a trivet or a heatproof mat for very hot cookware is a good habit regardless of the countertop material. A cast iron pan lifted directly from a high gas flame can reach temperatures that would stress granite, quartz, or any resin surface. The same common-sense kitchen practices that apply to other premium countertop materials apply here too. The surface is not fragile after full cure - it simply performs best when treated well.
The practical summary: for the first 21 days, use trivets for everything hot. After 21 days, normal kitchen heat is fine. For very high-temperature items straight from a flame or a very hot oven, use a trivet as a general habit. The surface will hold up, but there is no reason not to protect it.
Maintenance
Once cured, Craft Resin Table Top countertops need nothing beyond daily cleaning. Soft cloth, mild soap, dry promptly.
If the surface develops scratches or loses its gloss after years of use, a fresh coat of Craft Resin Table Top can be applied over the cured surface after sanding with 220-grit paper and a thorough clean. The new coat bonds to the prepared surface and restores the finish completely.
Quick Recap
- Craft Resin Table Top is the correct formula for countertop coating. Not Arts and Crafts. Not Deep Pour.
- Mix exactly 1:1 by volume with graduated cups, read at eye level
- The surface must be perfectly level, clean, degreased, and dry before starting
- Porous surfaces need a seal coat first and must reach the tacky stage before the main pour
- 72 hours before everyday kitchen use, 21 days for full heat resistance up to 80°C
- Suitable for incidental food contact once fully cured
- One coat at 3mm is a complete surface. Add a second coat for more depth or to refine the finish
- Common mistakes: skipping the seal coat on wood, not checking level, holding the torch still
FAQ: Epoxy Resin Kitchen Countertops
Can Craft Resin Table Top be used on kitchen countertops?
Yes. Craft Resin Table Top is one of the most effective applications for this formula. Once fully cured at 21 days, the surface is scratch-resistant, heat-resistant up to 80°C, non-porous, easy to clean, and suitable for incidental food contact. It works on existing countertops and on custom-built countertop bases.
How much does an epoxy resin countertop cost?
The material cost for Craft Resin Table Top on a standard kitchen countertop of 3 to 4 square meters is significantly less than the cost of professionally installed granite or quartz. Creating an epoxy resin countertop yourself can reduce costs while allowing complete control over the color, finish, and final design.
Is an epoxy resin countertop worth it compared to granite or quartz?
For DIY makers and homeowners who want a custom, high-end finish without professional installation costs, epoxy resin countertops are a great alternative. Granite and quartz require professional fitting and offer limited customization, while Craft Resin Table Top allows complete control over color, finish, and design effects.
Is an epoxy resin countertop food-safe?
Yes. Craft Resin Table Top is suitable for incidental food contact once fully cured at 21 days. The non-porous surface makes it easy to clean and suitable for everyday kitchen use.
How do you coat an existing laminate countertop with epoxy resin?
Clean and degrease the laminate surface before applying epoxy resin. Sand with 220 grit paper and make sure the surface is level. Mix Craft Resin Table Top at a 1:1 ratio by volume, pour onto the surface, guide the resin with a spreader, and remove bubbles with a torch using slow continuous passes. Leave covered and undisturbed for 72 hours.
What are the problems with epoxy resin countertops?
The main issues are preventable: bubbles from unsealed porous surfaces (fix: seal wood and concrete first), uneven surfaces from an unlevel base (fix: confirm level before mixing), cloudiness from high humidity (fix: work in a controlled environment), and soft patches caused by incorrect mixing (fix: measure accurately). The full list of common mistakes and solutions is covered in the table above.
How do you clean an epoxy resin countertop?
Clean an epoxy resin countertop with a soft cloth and mild soap for daily cleaning. Avoid abrasive cleaners, scouring pads, or bleach-based products because these can dull the glossy finish. No sealing or oiling is required.
How heat-resistant is an epoxy resin kitchen countertop?
Craft Resin Table Top is heat-resistant up to 80°C after 21 days of full cure. Normal kitchen heat from food preparation, warm plates, and appliances is not a problem. Use a trivet for hot pans and for anything coming straight off the hob or out of the oven.
How many coats does an epoxy resin countertop need?
One coat at 3mm provides a complete protective surface. A second coat can add depth and allow the finish to be refined. Apply the second coat during the tacky window, typically 4 to 8 hours after the first pour, to create a seamless chemical bond.
Further Reading and Watching
For more guidance on preparing your surface, curing epoxy resin correctly, removing bubbles, and choosing the right Craft Resin formula for your project, explore these helpful resources.
Choose the Right Craft Resin Table Top Kit Size for Your Project
Once you have measured your countertop surface and calculated how much epoxy resin you need, the next step is choosing the right Craft Resin Table Top kit size. Selecting the correct amount of resin helps you achieve an even, high-gloss finish while avoiding running short during your pour.
Choose the kit size that best matches your project:
Before ordering, always calculate your required resin volume based on your surface area and coating depth. It is recommended to allow a small extra amount for mixing, spreading, and material left in your mixing containers.