


Two 1:1 epoxy resins can look almost identical in the bottle, but behave completely differently once poured. That difference matters most when you are standing at a workbench trying to decide whether the resin made for a bar surface can also work in a jewelry mold - or whether the resin made for molds can be used to coat a countertop.
That is where many resin failures begin. The mistake is not usually mixing technique. It is product mismatch.
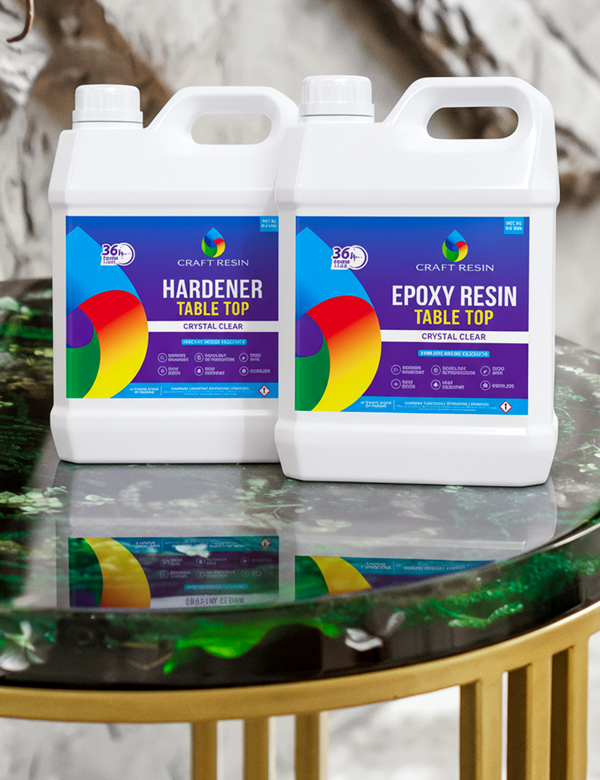
Craft Resin Table Top Epoxy and Craft Resin Arts & Crafts Resin are both clear, two-part, 1:1 epoxy systems, but they are formulated for different jobs. Table Top Epoxy is engineered to stay on a surface, self-level, and build a durable glossy coat. Arts & Crafts Resin is engineered to flow into molds, carry colour, release bubbles, and capture fine detail.
This guide gives you a property-by-property comparison of both formulas, including viscosity, layer depth, working time, cure time, heat resistance, UV resistance, bubble release, and colour behaviour. It also shows which resin to use for countertops, bar tops, tumblers, wooden boards, artwork, trays, coasters, jewelry, small castings, fluid art, and embedded objects.
Why So Many Different Types of Epoxy Resin Exist
Craft Resin manufacturer adjust each epoxy resin formula to suit different project types, which is why different types of epoxy resin behave differently even when they look similar in the bottle.
Think of Table Top resin as warm honey and Arts & Crafts resin as syrup. Honey stays where you put it - perfect for coating flat surfaces. Syrup flows and spreads freely - perfect for filling molds. That one difference explains almost every resin success and every resin failure. Using the wrong formula for the job is the most common reason resin projects fail, and it has nothing to do with technique.
Quick Decision: Which Resin Do You Need?
| I want to... | Use this |
|---|---|
| Coat a countertop, bar top, or kitchen surface | Table Top |
| Seal and protect a wooden board or tray | Table Top |
| Coat a tumbler or cup exterior | Table Top |
| Apply a glossy finish to artwork or canvas | Table Top |
| Pour resin into a mold for coasters or trays | Arts & Crafts |
| Make jewelry - rings, earrings, pendants | Arts & Crafts |
| Create fluid art, ocean scenes, or geodes | Arts & Crafts |
| Embed dried flowers, glitter, or small objects | Arts & Crafts |
| Pour deeper than 6mm in one layer | Deep Pour - neither of these |
If the answer is clear from this table, you have what you need. If you want to understand why, the rest of the article explains the mechanics behind each choice.
See how Table Top Epoxy and Arts & Crafts Resin behave differently before choosing your formula
Head-to-Head Comparison: Table Top vs Arts & Crafts Epoxy Resin
Choosing between Table Top Epoxy and Arts & Crafts Resin is not a small technical detail - it is the decision that determines whether the project works or fails. Both are clear 1:1 epoxy resin systems, and both may look similar in the bottle, but their performance properties are deliberately different.
Table Top Epoxy is engineered for coating and protecting surfaces. It is thicker, more controlled, and designed to self-level while staying where it is poured. Arts & Crafts Resin is engineered for decorative and mold-based work. It flows more freely, captures detail more easily, and gives pigments more room to move.
The comparison table below gives a quick-reference view of the epoxy resin differences that matter most. Use it as the anchor for the rest of this guide - each property explains why these two 1:1 resins behave differently in real projects.
| Specification | Table Top Epoxy | Arts & Crafts Resin |
|---|---|---|
| Viscosity | ~3800 CPS. Higher viscosity; thicker, more controlled flow | Lower viscosity; thinner, flows more freely |
| Mix ratio | 1:1 by volume | 1:1 by volume |
| Max pour depth per layer | 3mm / 1/8" per coat | Up to 6mm / 1/4" |
| Cure time | Hard cure around 36 hours; full cure up to 21 days | Typically 24-72 hours, depending on conditions and pour size |
| Working time (pot life) | ~30-45 minutes | ~45-60 minutes |
| Final hardness | Designed for durable, functional surface protection | Designed for decorative pieces, molds, and small castings |
| UV resistance | Strong UV inhibitors for exposed glossy surfaces | Standard UV resistance for craft and decorative use |
| Heat resistance | Up to 80°C / 176°F after full cure | Not intended for high-heat surface applications |
| Self-leveling | Yes; self-levels and holds on flat surfaces | Yes, but thinner flow can run off open edges |
| Scratch resistance | Higher surface durability for daily-use areas | Suitable for decorative pieces, not heavy-use surfaces |
| Bubble release | Moderate; thicker formula slows bubble rise | Faster; thinner formula allows bubbles to rise more easily |
| Yellowing resistance | Stronger protection for clear surface coatings | Suitable for crafts, but not the best choice for exposed functional surfaces |
| Best for | Countertops, bar tops, tumblers, wooden boards, artwork, serving trays | Coasters, jewelry, silicone molds, keychains, fluid art, small castings |
Best Use Cases for Table Top Epoxy Resin
Table Top is built for surface applications - anywhere you need a hard, glossy, durable coat that stays in place and does not run. Its high viscosity (3800 CPS mixed) means it self-levels across a flat surface, builds a smooth 3mm coat, and holds position while curing.
Countertops and bar tops. The formula is heat-resistant up to 80°C / 176°F after full cure, scratch-resistant, and waterproof. It is built to hold up under daily use, spills, and surface contact - making it the correct choice for functional surfaces, not just decorative ones.
Wood coating and furniture refinishing. Table Top resin enhances wood grain, fills small surface imperfections, and locks in a glass-like finish. Its self-leveling behaviour works with the surface to produce an even coat without excessive manual spreading.
Tumblers and cups. Thin resins run downward on a spinning tumbler, collect at the bottom edge, and leave the top bare. Table Top resin clings to the surface and spreads evenly as the tumbler spins - working with gravity instead of against it. Apply to the exterior only. Do not apply resin to surfaces that contact lips or hot liquids.
Artwork and canvas coating. For sealing and protecting resin art or canvas prints, Table Top builds the protective gloss layer and stays in place while curing. If you want to avoid fish eyes, craters, and dry spots on larger surfaces, read our full guide to achieving a glass-like Table Top finish.
Trays and serving boards. The food-safe-when-cured formula and durable surface make Table Top a reliable choice for decorative and functional trays. Keep each coat within the 3mm layer limit for the cleanest cure and best clarity.
Best Use Cases for Arts & Crafts Resin
Arts & Crafts resin is designed for projects where fluidity, detail capture, and colour movement matter more than surface hardness. Its lower viscosity lets it flow freely into mold cavities, release bubbles faster, and carry pigments smoothly throughout the pour.
Molds - coasters, trays, jewelry shapes. Arts & Crafts resin fills mold corners cleanly, encapsulates inclusions like dried flowers and foils, and releases bubbles faster than a thicker formula. Coasters, pendants, small decorative trays, and keychains all benefit from a formula that moves easily and fills every detail of the mold.
Jewelry and small castings. For rings, earrings, charms, and similar pieces, the lower viscosity helps achieve a cleaner fill in shallow molds. Colours layer and blend more naturally. The formula also responds better to mica powders, dyes, and alcohol inks.
Fluid art and pigment blending. Arts & Crafts resin gives pigments room to move. Ocean scenes, geode designs, abstract pours - all of these techniques rely on a formula that lets colour flow, lace, and bloom before the resin begins to set. A thick Table Top formula does not allow that kind of movement.
Small encapsulations. Embedding objects - pressed flowers, small photos, glitter is easier with a thinner formula that flows around the object cleanly and cures with fewer trapped bubbles.
Can Arts & Crafts Resin Replace Table Top? The Honest Answer
Arts & Crafts resin cannot reliably replace Table Top on flat surfaces. It will flow off the edges before it can cure into a stable coat. Gravity wins every time with a thin formula on a flat surface - the resin is doing exactly what it was designed to do. It is just the wrong tool for that job.
The same works in reverse. Table Top resin can be used in some mold applications as long as you keep the pour within the 3mm layer depth. It will not move colours as freely, but it will cure and hold its shape.
For projects that require neither coating nor shallow casting - river tables, thick decorative blocks, object encapsulation - neither formula is the answer. That is where Craft Resin Deep Pour applies, with pour depths up to 50–60mm in a single layer.
| Project | Best Formula | Can You Substitute? |
|---|---|---|
| Countertop / bar top coating | Table Top | No, Arts & Crafts will run off |
| Tumbler coating | Table Top | No, Arts & Crafts will drip |
| Wood sealing / furniture | Table Top | No, needs thickness to hold position |
| Artwork and canvas sealing | Table Top | No, thin formula will not dome |
| Coasters in a mold | Arts & Crafts | Table Top works within 3mm depth |
| Jewelry and pendants | Arts & Crafts | Table Top is harder to fill fine detail |
| Fluid / pigment art | Arts & Crafts | Table Top does not allow colour movement |
| River table / deep casting | Deep Pour | Neither, different product required |
What Happens When You Use the Wrong Formula
Most resin problems are product-match problems, not technique problems. Here is exactly what goes wrong in each mismatch scenario.
Arts & Crafts resin on a flat surface (board, tray, counter). Arts & Crafts resin cannot build a stable surface coat - it flows to the edge and runs over. The result is thin, uneven coverage in the centre, drips along the sides, and inconsistent gloss. No amount of careful pouring fixes a viscosity problem. Switch to Table Top.
Table Top resin in a deep mold or casting. The thick formula fills slowly and traps more air bubbles than a thinner formula would. Colours do not blend or move freely because the viscosity restricts pigment travel. For deep casts, the slow bubble release creates voids. For fluid art, the lack of movement kills the technique.
Table Top resin poured too thick in one layer. Craft Resin Table Top is rated for 3mm / 1/8" per coat. Exceeding this generates more heat during the curing reaction (exotherm), which can cause yellowing, cracking, or a wavy surface. Build thickness in multiple layers, allowing each one to cure before adding the next.
Arts & Crafts resin on a tumbler. Thin resin migrates downward on a spinning tumbler, collects at the bottom edge, and leaves the upper section bare or uneven. It is also more prone to fish-eye defects from fingerprints or dust - a lighter formula pulls away from surface contamination rather than covering it.
How to Mix and Apply Each Formula: First Pour Guide
The mixing process is the same for both formulas, but the pour behaviour differs from the moment the resin leaves the cup.
Step 1 - Measure accurately. Use a digital scale or graduated cups. Both formulas require a 1:1 ratio by volume. Inaccurate measuring is one of the most common causes of a tacky or soft cure.
Step 2 - Mix slowly for 3-4 minutes. Stir gently but thoroughly, scraping the sides and bottom of the cup. Avoid whipping - fast mixing introduces air bubbles that slow curing. For deeper colour work with Arts & Crafts, add pigment to Part A before adding Part B and mix fully.
Step 3 - Let the mixed resin rest for 2-3 minutes. After mixing, pause before pouring. This allows surface bubbles from mixing to rise and pop on their own before the material reaches the mold or surface.
Step 4 - Pour correctly for your formula. For Table Top: pour slowly from a low height onto the centre of the surface and let the resin self-level outward. For Arts & Crafts: pour from one corner of the mold in a thin stream, letting the resin rise naturally around any inclusions.
Step 5 - Remove bubbles with a torch or heat gun. A brief pass at 15-20cm removes surface bubbles in both formulas. Keep the heat moving and work quickly - holding the torch in one place for too long can cause yellowing or surface marks.
Step 6 - Cover and leave undisturbed. Do not move the piece while curing. A dust cover (a cardboard box placed loosely over the work) prevents debris from settling on the surface while the resin is still liquid.
Pro Tips: Table Top Resin
Respect the 3mm layer limit, every time. The most reliable way to avoid a cloudy, wavy, or yellowed Table Top coat is to stay within the 3mm / 1/8" layer limit. If you need more build, add a second coat after the first has cured. Do not try to achieve depth in a single thick pour.
Seal porous surfaces before coating. Wood, concrete, and other porous materials can release air as the resin warms during curing. This creates bubbles and craters in the finish. Apply a thin seal coat first, let it cure, then apply the flood coat over the sealed surface.
Warm the bottles before mixing in cold conditions. If the resin pours slowly or looks cloudy, the room temperature is likely below 18°C. Stand both bottles in warm (not hot) water for 5-10 minutes before mixing to restore normal flow.
Apply in two thin coats rather than one thick one. Two coats of 2-3mm each give a cleaner, harder, more consistent finish than one thicker pour. Lightly sand the first cured coat with 220-grit paper, wipe clean, and apply the second coat directly
Pro Tips: Arts & Crafts Resin
Work quickly once pigment movement starts. Arts & Crafts resin has more working time than Table Top, but pigment movement becomes harder to control as the resin thickens. Plan the pour sequence before you mix, and work with purpose once the resin is in the mold.
Use less pigment than you think you need. Heavily pigmented Arts & Crafts resin blocks UV light more than a lightly pigmented mix. This is not an issue for epoxy curing (unlike UV resin), but very dark or very thick pigment loads can result in longer cure times and slightly softer results. Start with 2-5% pigment by weight and adjust from there.
Layer colours for depth rather than blending everything at once. Pouring one colour, partially curing, then adding the next creates sharper definition and more visual depth than trying to blend multiple colours in a single pour. This technique is especially effective for ocean art and geode designs.
Warm the mold slightly for better detail capture. A slightly warm silicone mold (not hot - just above room temperature) helps thin resin fill fine details more completely and reduces the chance of small bubbles sticking to the mold surface.
Quick Recap: Table Top vs Arts & Crafts Resin
Before you pour, keep these points in mind
- Table Top is thick (3800 CPS) - use it for coating flat surfaces, tumblers, wood, countertops, and artwork
- Arts & Crafts is thinner and more fluid - use it for molds, coasters, jewelry, fluid art, and small castings
- The honey vs syrup analogy captures the difference: honey stays put, syrup spreads and runs
- Neither formula replaces the other on its core application
- Table Top layer limit is 3mm per coat - build thickness across multiple coats
- For pours deeper than 6mm, use Deep Pour resin - not either of these
- Wrong formula is the most common cause of resin failure on flat surfaces
FAQ
What is the difference between Table Top and Arts & Crafts epoxy resin?
The main difference is viscosity. Table Top resin is thicker (around 3800 CPS when mixed), which allows it to self-level and hold a 3mm coat on flat surfaces without running. Arts & Crafts resin is thinner and flows more freely, making it better suited for molds, castings, and fluid art where colour movement and detail capture matter more than surface hold.
Which Craft Resin formula is best for tumblers?
Table Top is the correct formula for coating tumblers. Its higher viscosity clings to the curved surface while the tumbler spins and does not migrate toward the bottom edge the way a thinner formula does. It also contains stronger UV inhibitors to keep the finish clear over time. Apply to the exterior only.
Can I use Arts & Crafts resin to coat a table or countertop?
Not reliably. Arts & Crafts resin will flow off the surface edges before it can cure into a stable coat. For flat surface coating - tables, countertops, bar tops, serving boards - use Table Top resin. It is specifically formulated to stay in place and build a durable, hard surface coat.
Why is my resin running off the edges of my surface?
The most likely cause is using a formula that is too thin for the application. Arts & Crafts resin is not designed to hold on flat surfaces - it does exactly what it was built to do, which is flow. Switch to Table Top resin, which self-levels and holds a 3mm coat without running.
How thick can I pour Table Top resin in one coat?
Craft Resin Table Top is designed for coats up to 3mm / 1/8" at a time. Pouring thicker than this increases the risk of exotherm (heat buildup during curing), which can cause yellowing, bubbling, or an uneven surface. For more depth, pour multiple coats with a full curing period between layers.
Can I add pigment or mica to Table Top resin?
Yes. Both formulas accept mica powders, resin dyes, alcohol inks, and silicone pigments. For Table Top, mix pigment into Part A before adding Part B. Use no more than 5-6% pigment by total mix weight to avoid affecting the cure. Very opaque pigment loads can slightly extend cure time.
Why does my resin cure with fish eyes or dry spots on large surfaces?
Fish eyes and dry spots on large coated surfaces are usually caused by surface contamination (skin oils, silicone residue, or dust), inconsistent room temperature, or using a formula with too low a viscosity for the application. Make sure the surface is clean and sealed before coating, maintain a stable room temperature of 21-25°C, and use Table Top resin for flat surface applications.
How many coats of Table Top resin do I need?
One coat is enough for most artwork and light-use surfaces. For countertops, bar tops, and high-traffic surfaces, two coats give a harder, more resilient finish. Apply the second coat after the first has fully cured (at least 36 hours), lightly sand with 220-grit paper, wipe clean, and pour the second coat directly.
Ready to Choose the Right Formula?
Most resin problems are not technique problems - they are product-match problems. Once you know which formula belongs on which project, the results follow naturally. Honey for surfaces. Syrup for molds.
Shop Craft Resin Table Top Epoxy for your next countertop, board, or tumbler project.
Shop Craft Resin Arts & Crafts Resin for molds, coasters, jewelry, and fluid art.